Schedule a collection
Scheduling collections gives merchandisers full control over when a collection is visible to shoppers.
With this feature, merchandisers can set start and end dates for any collection, defining the exact time window during which it will be available on a site. Outside that window, the collection behaves as if it does not exist, ensuring shoppers see only what is intended, exactly when it is intended.
This makes it easy to:
- Prepare in advance: Build out collections days or weeks before launch. Collections can include items currently in a catalog or future items that will upload at a later date.
- Launch on time: Collections automatically go live at the scheduled start date.
- End cleanly: Limited-time collections automatically become unavailable after the end date.
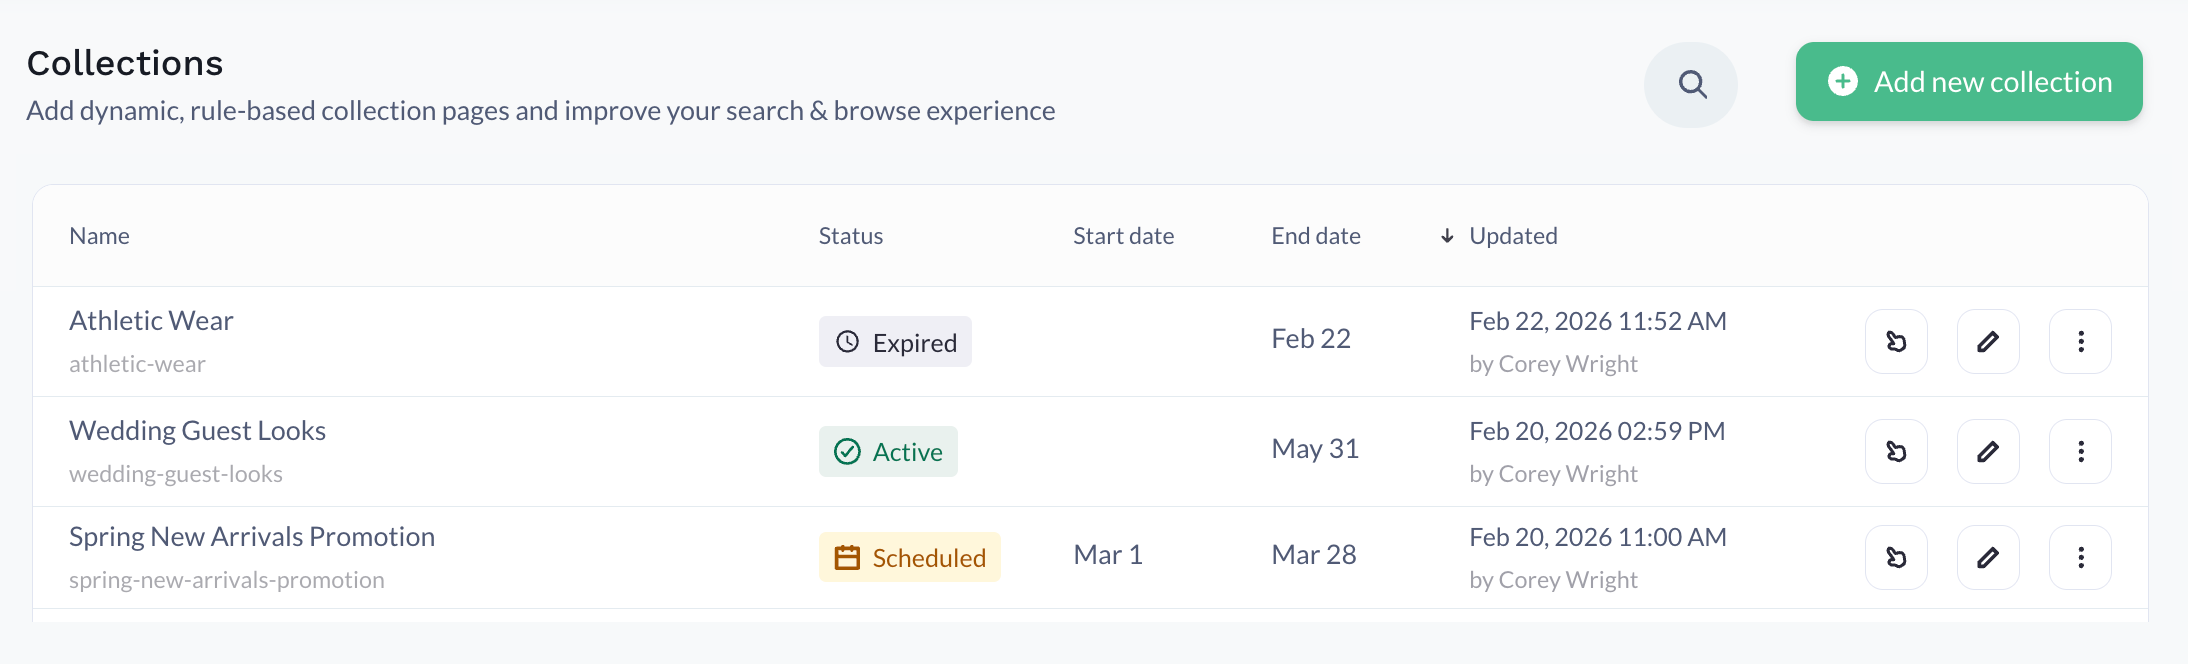
From the Collections workspace, merchandisers can clearly see each collection's scheduling status (e.g., Scheduled, Active, or Expired ) along with its configured start and end dates.
Schedule a collection
Adding start and end dates to a collection is optional. You can set a start date with no end date defined, or only define an end date if the collection is going live immediately upon creation.
- Select Workspace in the side menu of the Constructor dashboard, then select Collections.
- Select Add new collection in the top-right corner of the page.
- On the pop-up, enter the collection Name and ID.
- To enter a start date, select the Start Date toggle.
- Use the calendar picker to select the specific start date for the collection.
- Use the drop-downs to the right of the date field to enter the specific start time of the collection. This includes hour, minute, and AM/PM options.
- To enter an end date, select the End Date toggle.
- Use the calendar picker to select the specific end date for the collection.
- Use the drop-downs to the right of the date field to enter the specific end time of the collection. This includes hour, minute, and AM/PM options.
- Select Create in the bottom-right corner of the pop-up.
The assigned schedule dates will appear at the top of the Add Items page. You can select the dates at any time to edit the schedule.
Please noteCollection updates are processed at short intervals, so a collection may take up to 2 minutes after its scheduled start time to become available on your site.
Add a schedule to an existing collection
- Select Workspace in the side menu of the Constructor dashboard, then select Collections.
- Locate the collection to which you wish to add dates.
- Select the collection name or the edit icon on the far right of the collection row.
- Select the calendar icon at the top of the Add Items page.
- On the pop-up, enter the desired schedule dates:
- To enter a start date, select the Start Date toggle.
- Use the calendar picker to select the specific start date for the collection.
- Use the drop-downs to the right of the date field to enter the specific start time of the collection. This includes hour, minute, and AM/PM options.
- To enter an end date, select the End Date toggle.
- Use the calendar picker to select the specific end date for the collection.
- Use the drop-downs to the right of the date field to enter the specific end time of the collection. This includes hour, minute, and AM/PM options.
- To enter a start date, select the Start Date toggle.
- Select Save in the bottom-right corner of the pop-up.
Edit an existing schedule

- Select Workspace in the side menu of the Constructor dashboard, then select Collections.
- Locate the collection you wish to edit.
- Select the collection name or the edit icon on the far right of the collection row.
- Select the schedule dates at the top of the Add Items page.
- On the pop-up, edit the schedule dates as needed.
- Select Save.