Configure Retail Media settings
Only retailers can access settings specific to advertisements and campaigns. They can manage settings from their Retail Media dashboard.
Specifically, retailers can:
- Choose to allow or disallow ads for specific search queries, on specific browse pages, and for specific recommendation pods.
- Set the minimum cost per click (CPC) for all campaigns, regardless of advertiser.
- Set the minimum CPC for specific queries, browse pages, and recommendation pods, such as top-performing queries or pods, or seasonal categories.
Allow or disallow ads for specific results pages and pods
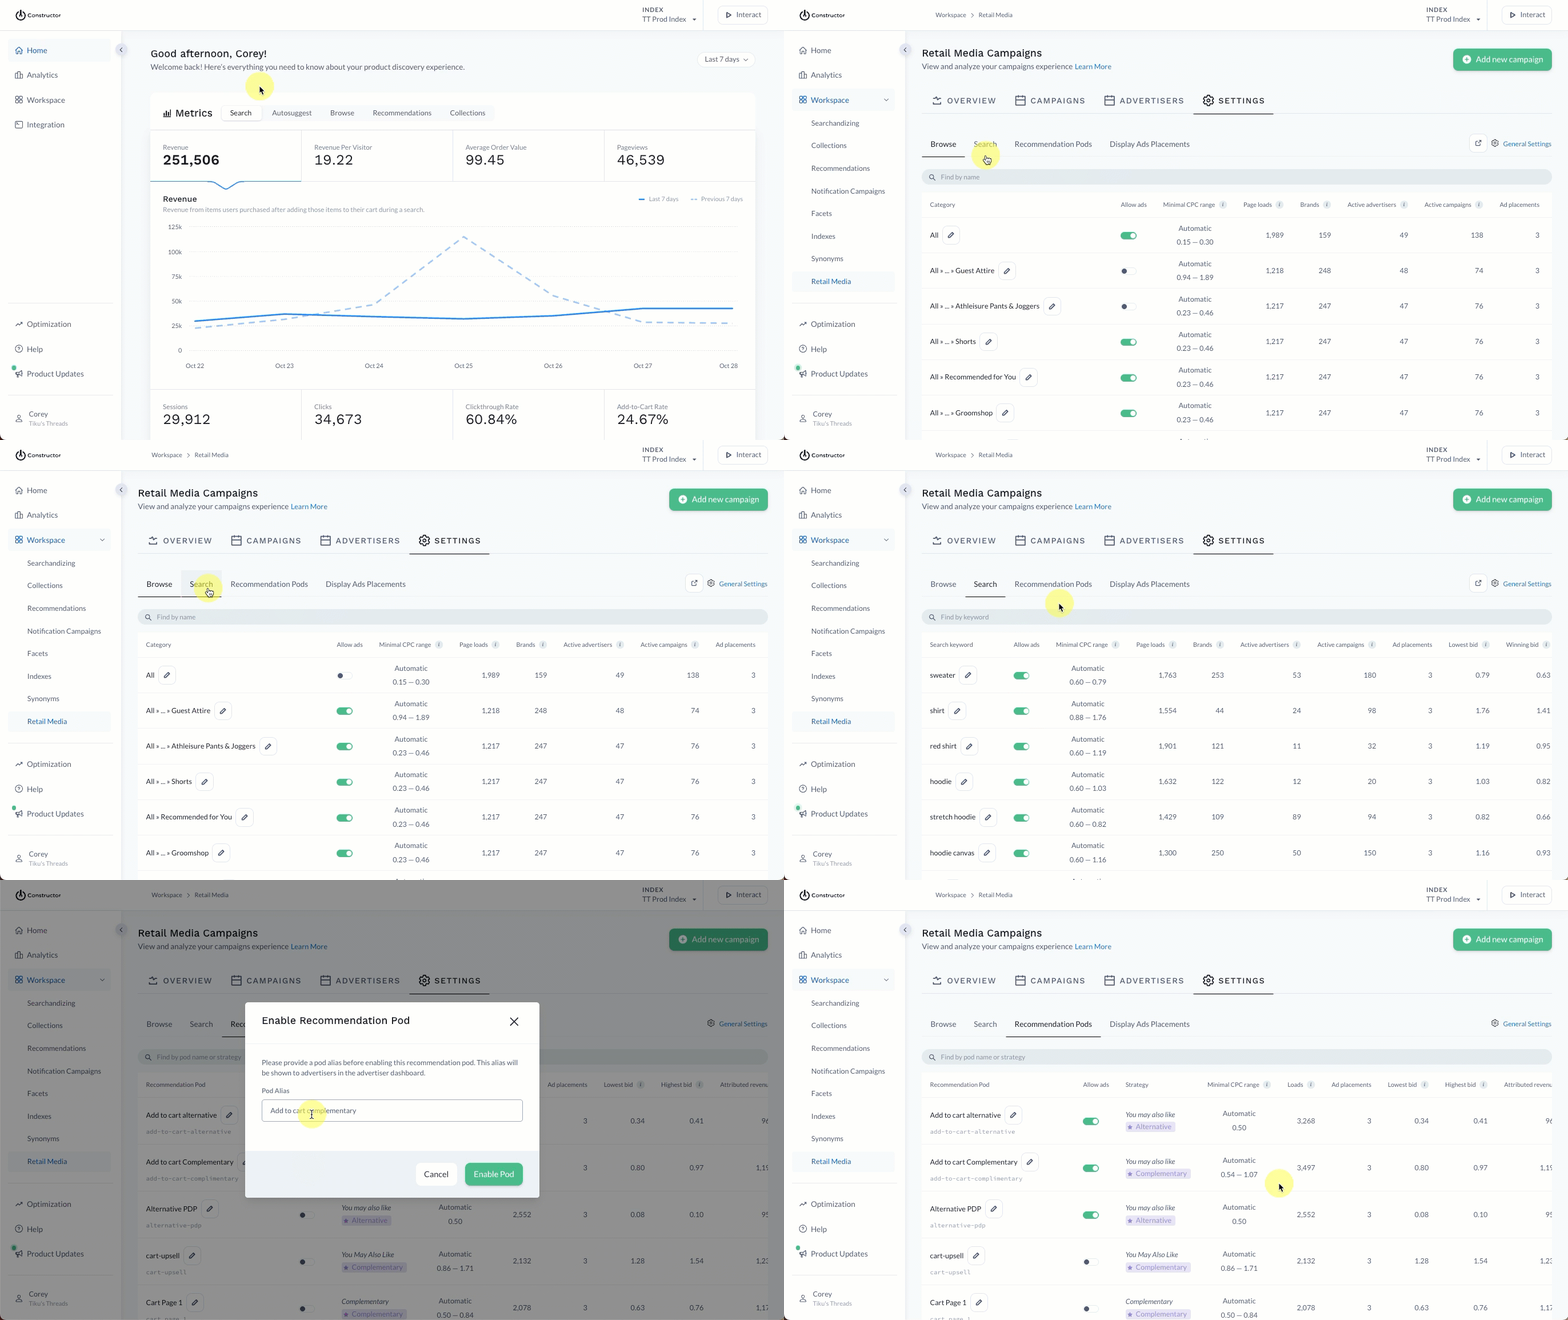
- Select Workspace in the side menu of the Constructor dashboard, then select Retail Media.
- Select the Settings tab at the top of the page.
- Choose the context (e.g., Browse, Search, Recommendation Pods, etc.) where you wish to allow/disallow ads by selecting the corresponding tab at the top of the listing.
- Locate the Allow ads column.
- If you wish to allow ads for a specific browse page/query/pod, turn on the Allow ads toggle for that context. Toggles appear green when on.
- Note: If allowing ads for a recommendation, you will be prompted to assign the pod a name that will appear for advertisers in their dashboard. Enter the name in the field provided, then select Enable Pod.
- If you do not wish to allow ads for a specific browse category, turn off the Allow ads toggle for that category. Toggles appear white when turned off.
Constructor automatically saves and applies any toggle changes.
Impact of disallowing ads on existing campaignsIf a company chooses to disallow ads for a specific browse page/query/pod, then the change will go into effect for the next auction cycle for any existing campaigns targeting that page.
Set cost per click minimums
Set minimum CPC for results pages and pods
You can choose to set the default minimum CPC for all search and browse results pages as well as recommendation pods.
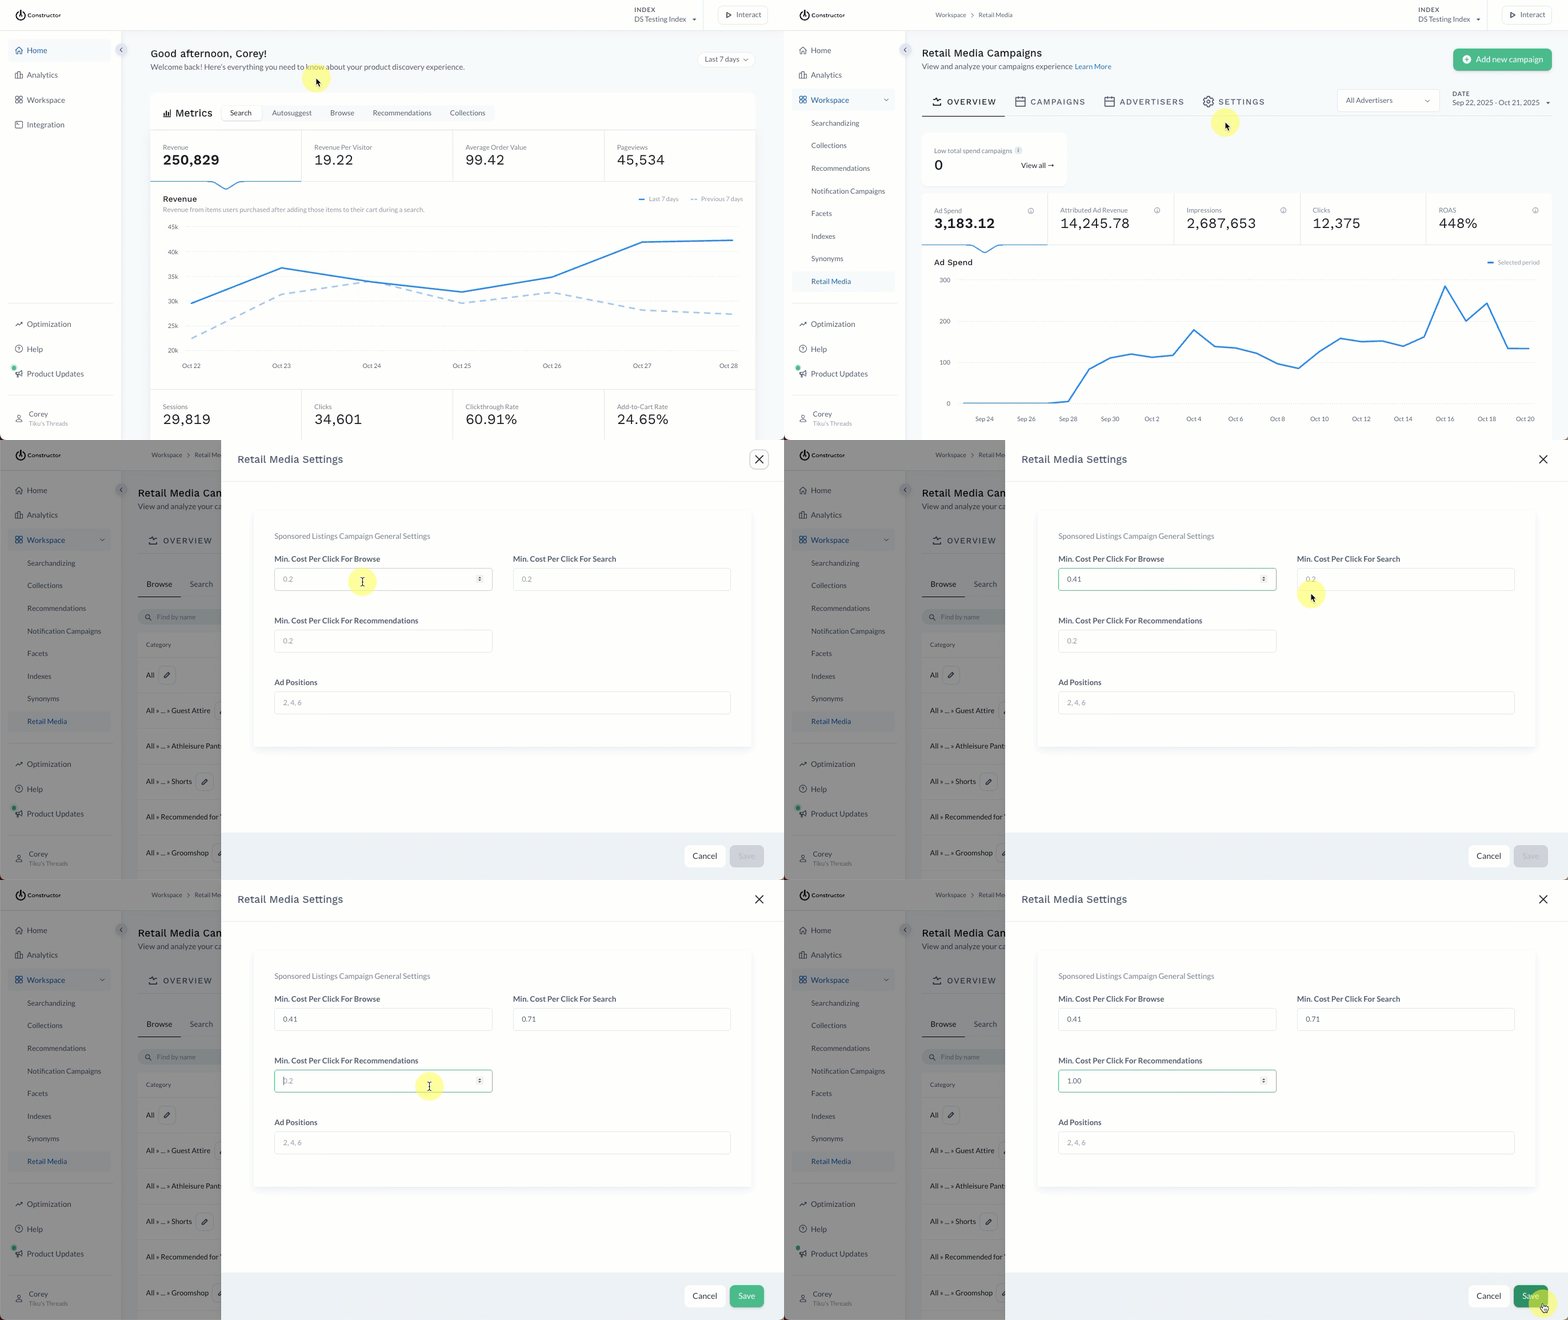
- Select Workspace in the side menu of the Constructor dashboard, then select Retail Media.
- Select the Settings tab at the top of the page.
- Select General Settings in the top-right corner of the page.
- On the fly out, locate the Min. Cost Per Click for Browse, Min. Cost Per Click for Search, and Min. Cost Per Click for Recommendations fields.
- Enter the desired amount or use the up/down arrows to increase or decrease the amount.
- Select Savein the bottom-right corner of the page.
Set minimum CPC for specific results pages or pods
You can choose to set the minimum CPC for specific search and browse results pages as well as recommendation pods.
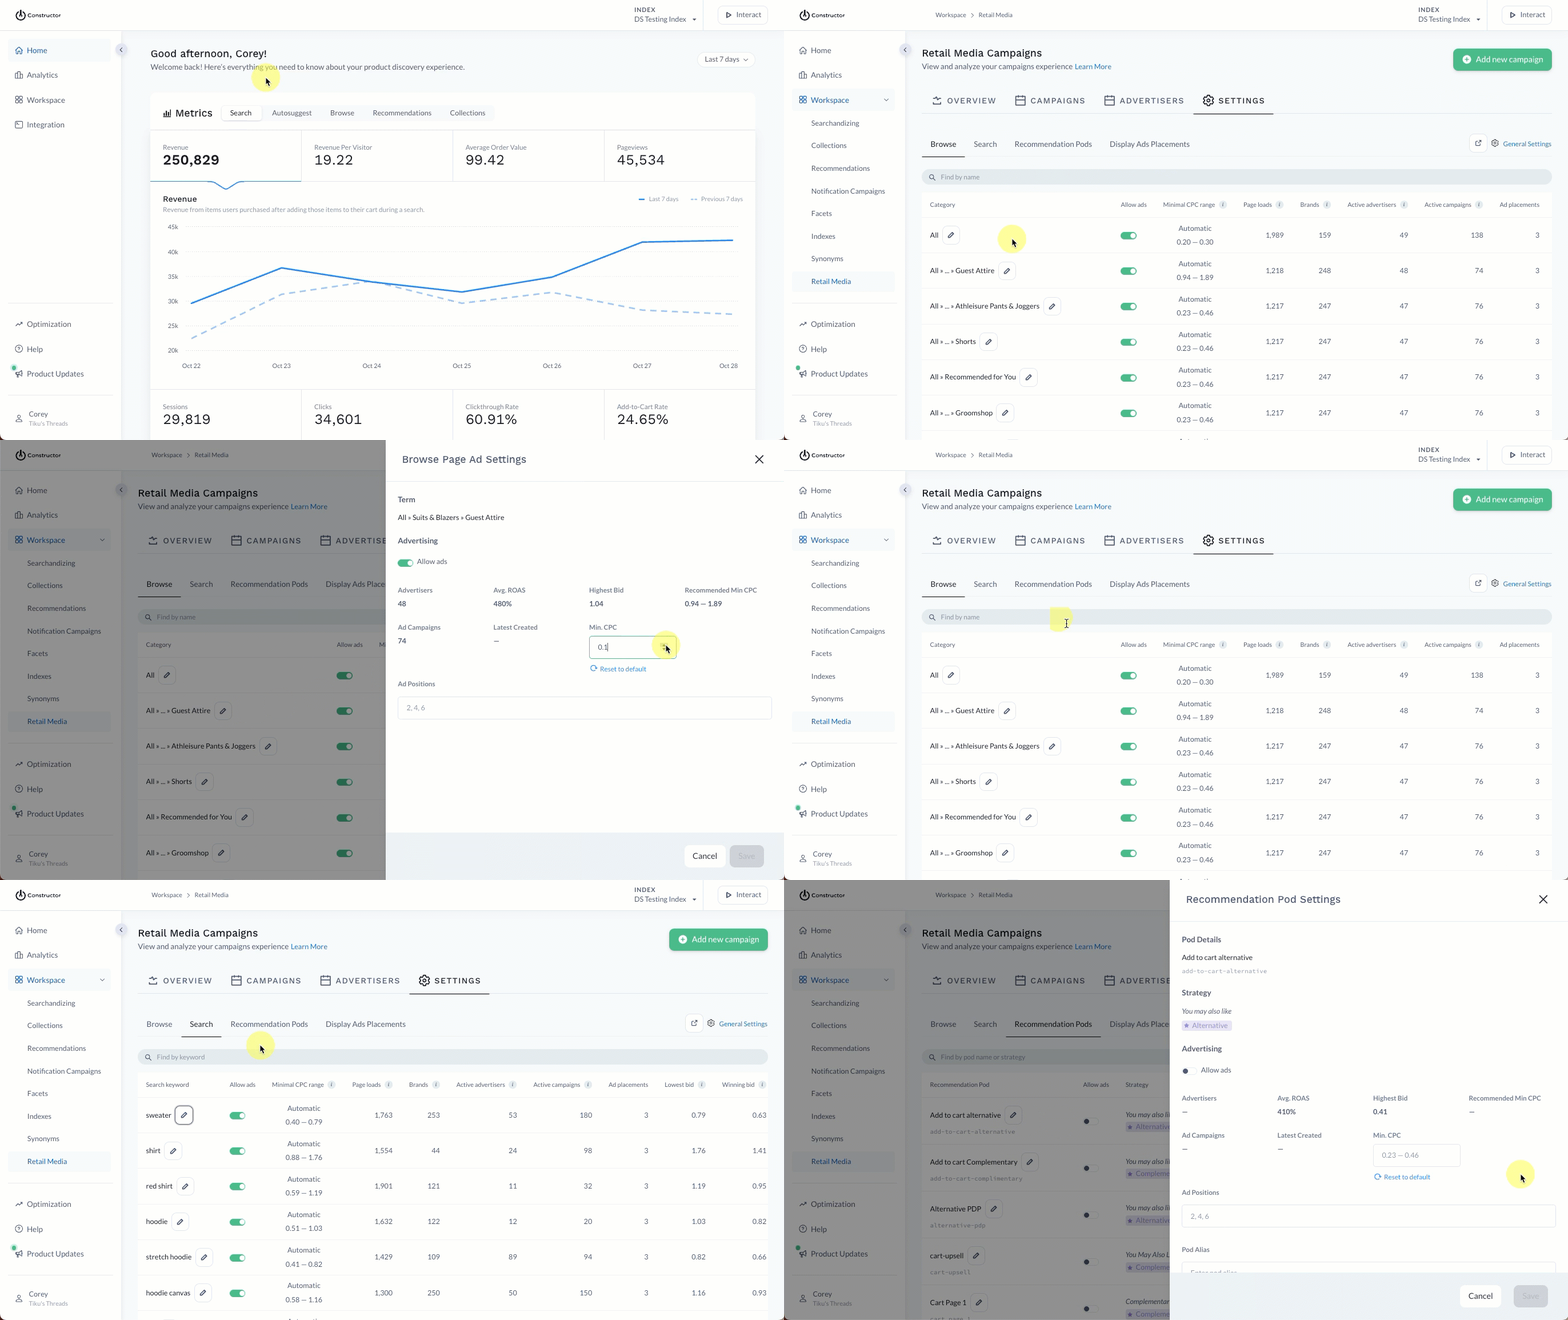
- Select Workspace in the side menu of the Constructor dashboard, then select Retail Media.
- Select the Settings tab at the top of the page.
- Choose the context (e.g., Browse, Search, Recommendation Pods, etc.) where the specific results page or pod exists.
- Select the pencil icon to the right of the browse page/query/pod name.
- On the fly out, locate the Min. CPC field.
- Enter the desired amount or use the up/down arrows to increase or decrease the amount.
- Select Save in the bottom-right corner of the page.
Set sponsored listing positions
Set sponsored positions for all results pages and pods
You can define sponsored items positions for all search and browse results pages as well as recommendation pods. By default, these positions are #2, #4, and #6.
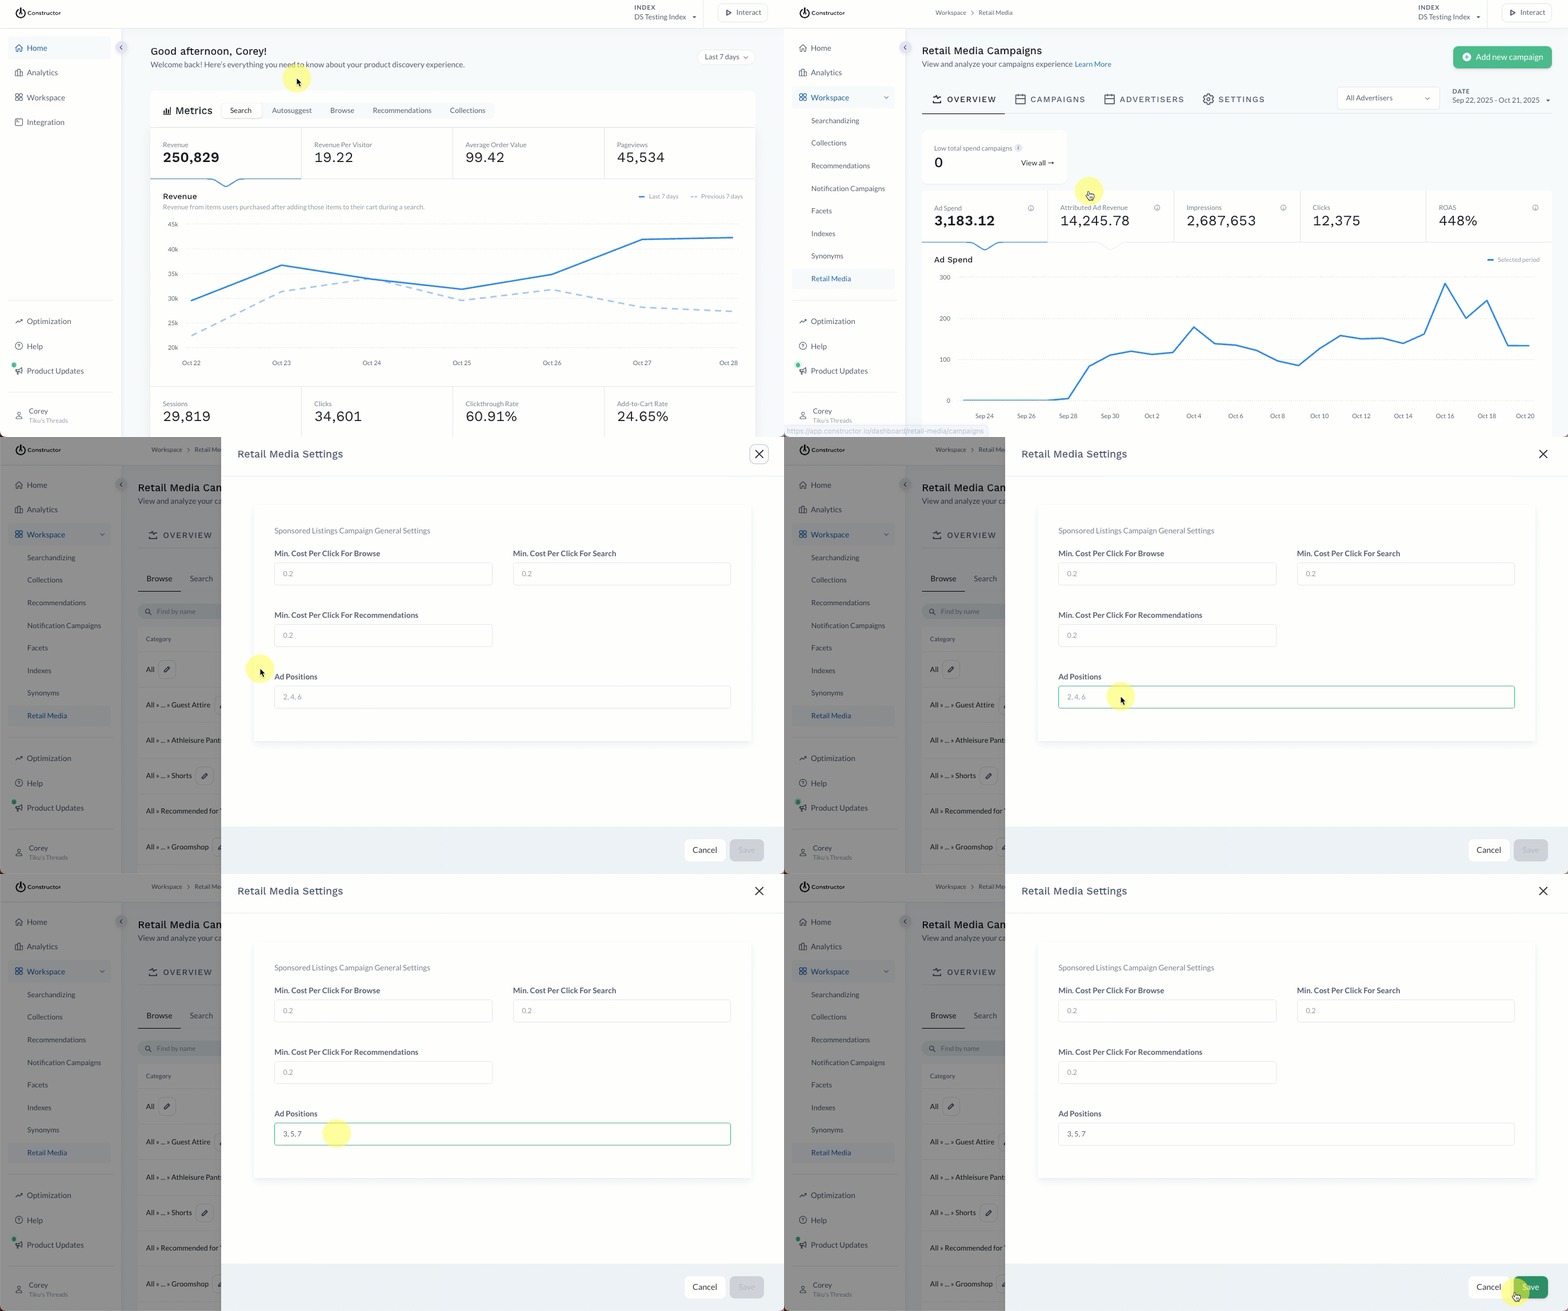
- Select Workspace in the side menu of the Constructor dashboard, then select Retail Media.
- Select the Settings tab at the top of the page.
- Select General Settings in the top-right corner of the page.
- On the fly out, locate the Ad Positions field.
- Enter the desired positions, separating each with a comma. You can define more than the default three positions, if desired.
- Select Savein the bottom-right corner of the page.
Set sponsored positions for specific results pages or pods
You can define sponsored items positions for specific search and browse results pages as well as recommendation pods.
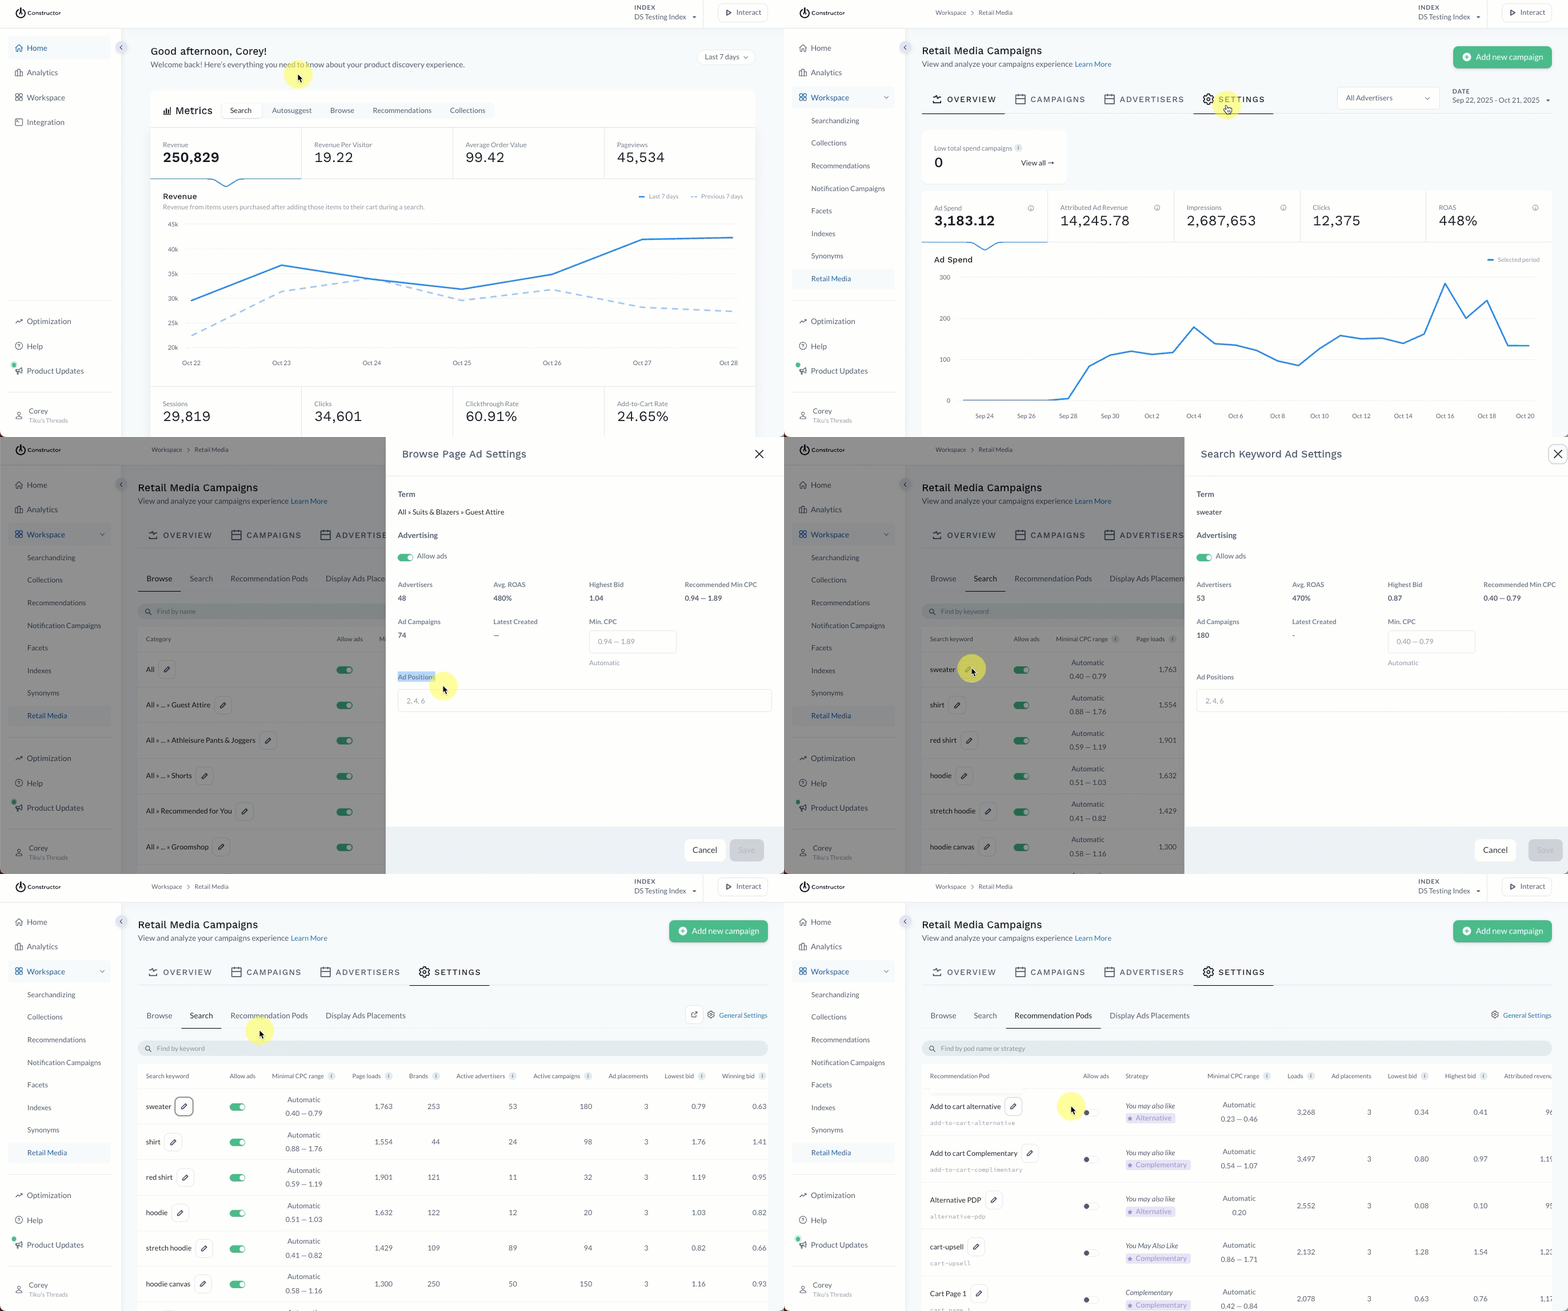
- Select Workspace in the side menu of the Constructor dashboard, then select Retail Media.
- Select the Settings tab at the top of the page.
- Choose the context (e.g., Browse, Search, Recommendation Pods, etc.) where the specific results page or pod exists.
- Select the pencil icon to the right of the browse page/query/pod name.
- On the fly out, locate the Ad Positions field.
- Enter the desired positions, separating each with a comma. You can define more than the default three positions, if desired.
- Select Save in the bottom-right corner of the page.
Updated 3 months ago