Development flow
The development flow outlined here includes the steps and CLI commands needed to develop, execute, and test templates using the Connect CLI. If you haven't already, make sure you have initialized a repository.
Step 1: Generate fixtures
The first step to develop your templates is to generate fixtures. You can think of fixtures as the raw data that will be piped through the connector for each template. They represent the same data structure that will be used in your actual live integration.
Fixtures live in the src/fixtures folder, within their respective fixture type folder. To generate a new fixture, use the generate-fixture command:
npm run generate-fixture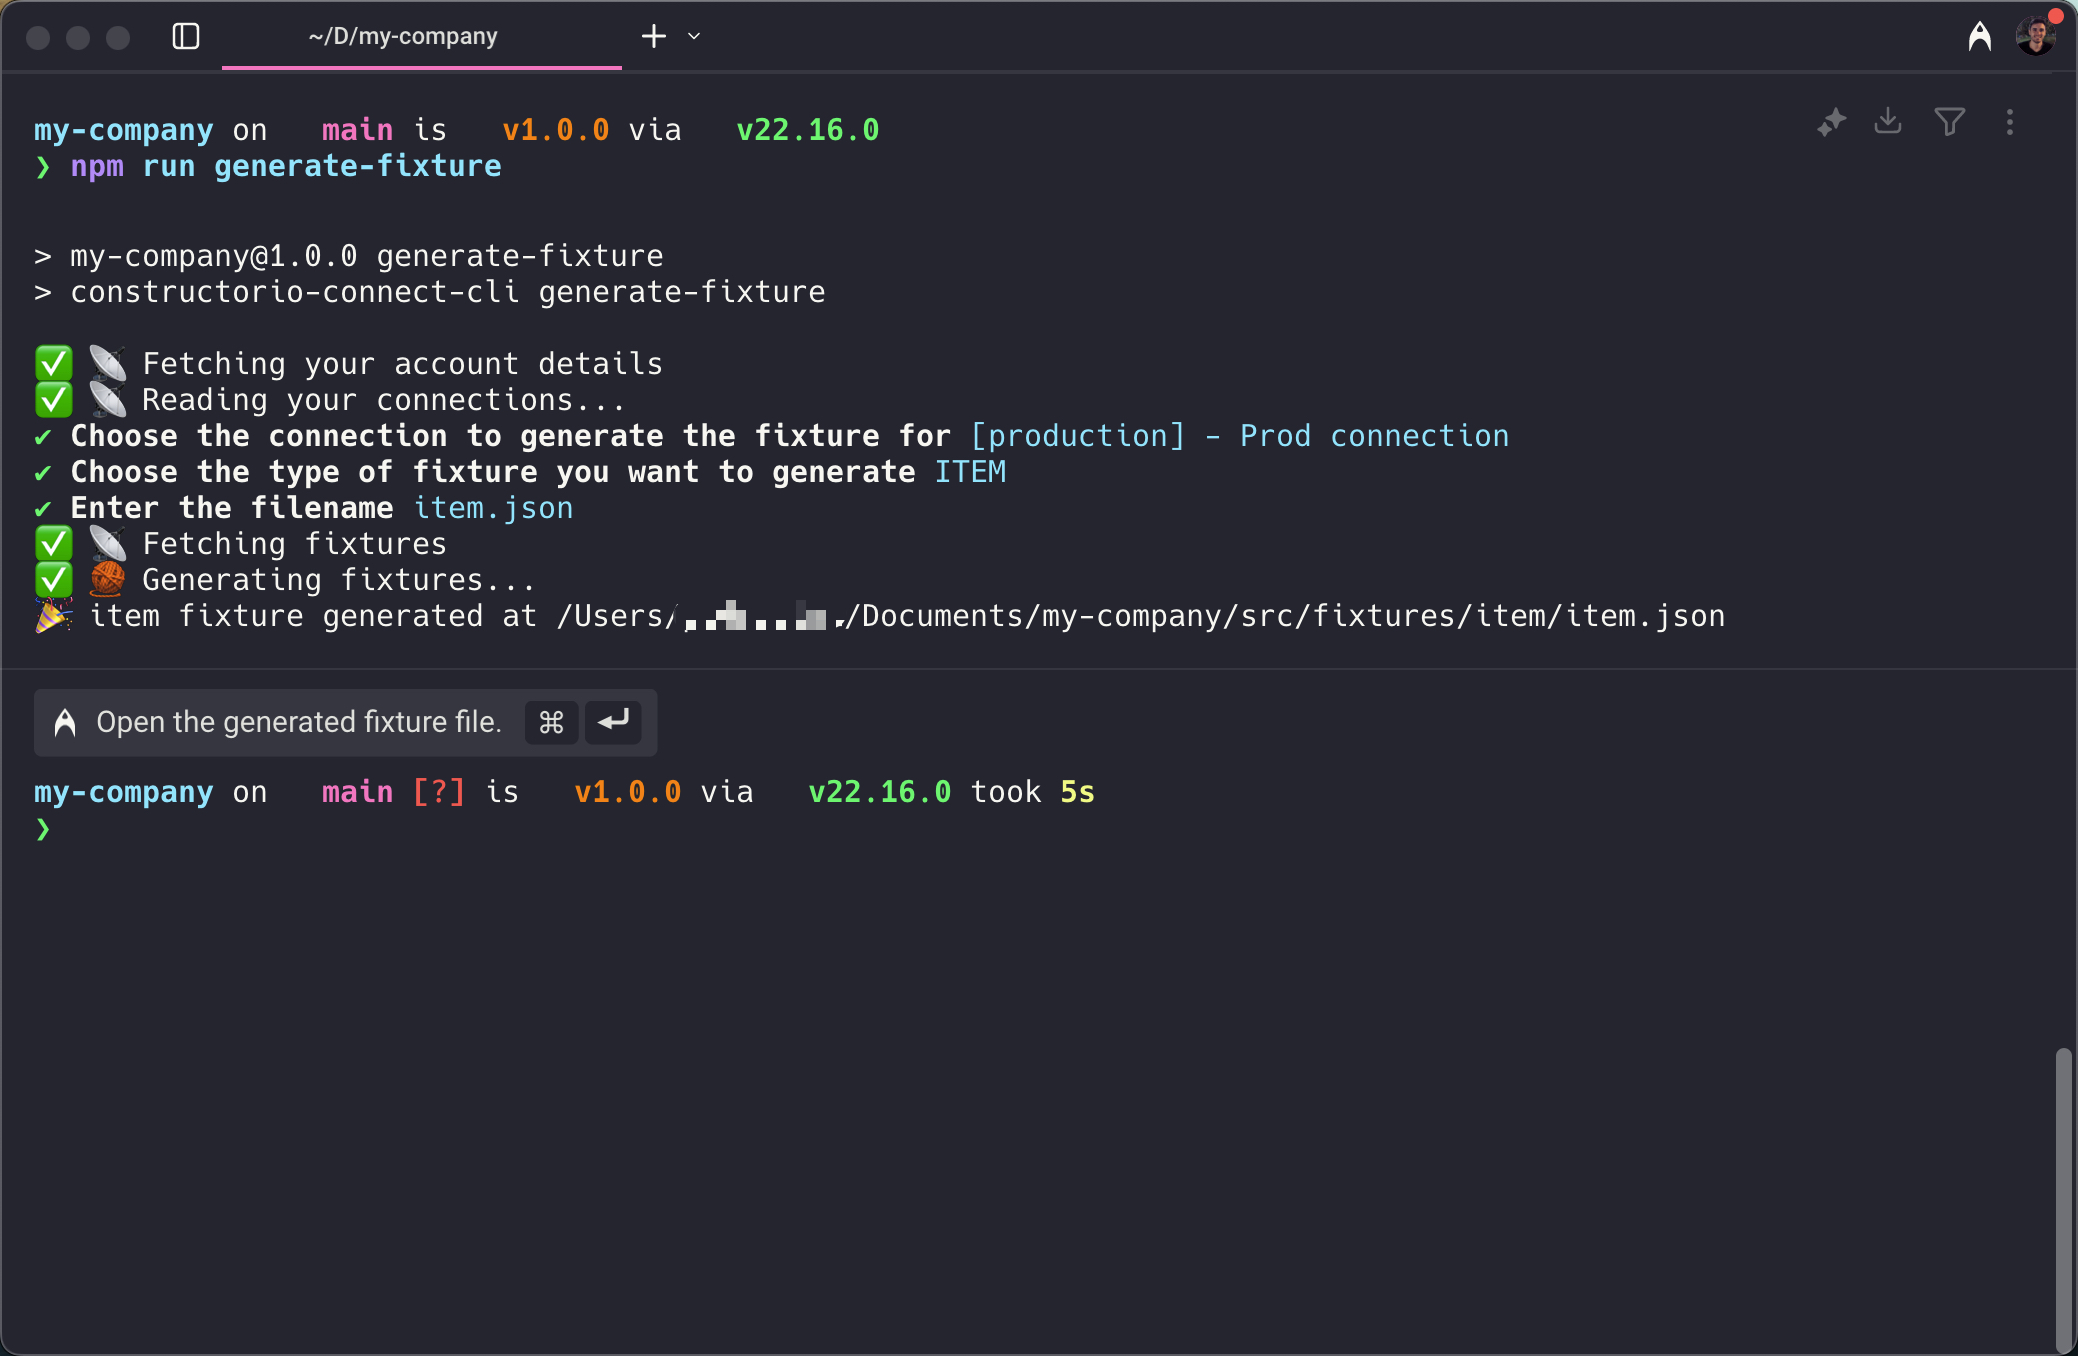
Generating an item fixture
After running the command, you will need to specify a few inputs:
- Choose the connection to generate the fixture for. This is important, as different connections can have different partners, and thus different data structures for your fixtures.
- Choose the type of fixture you want to generate. This ties directly to the template type, as different templates rely on different types of fixtures (data) to be executed. Options include:
- Mapping: Used exclusively for the Omni Connector to create a mapping template.
- Item: Used for item templates.
- Variation: Used for variation templates.
- Item group: Used for item group templates.
- External Data: This data is injected into all templates, and changes according to which connector you are using. It can hold any data, such as the connection information, global store configurations, etc.
- Enter the filename. Enter a name for the fixture file. If the file already exists, the CLI will prompt you to overwrite it.
You can use fixtures to directly execute templates as shown in Step 2, and also to execute automated tests as shown in Step 3.
Step 2: Develop and execute your templates
A template will allow you to transform the data from the connector input into a format that Constructor understands. Currently, our connectors use JSONata as the base engine to run templates. You can also try out templates in real time using the JSONata Exerciser.
Each template has access to two main pieces of data:
data: This is the main data being transformed by the template. In an item template, for example, it might be the raw product data.external: This holds any additional pieces of data available to the connector during runtime. It changes per connection and partner.
Deprecation notice on field namesAs of June 2026, to simplify the data mapping process, the data points were renamed:
targetDatatodataexternalDatatoexternalThe old names will still work if used in your templates, but you'll get deprecation warnings.
You should plan to migrate to the new variable names whenever possible for best stability and support.
To get started, head tosrc/templates and open a template file within the respective template type folder. At any given point in time, you can execute your template against the connector to gather real-time data on how it would resolve.
To execute templates, use the execute command:
npm run executeAssuming you have a valid item template:
{
  "item_name": data.title,
  "active": data.status = "ACTIVE"
}
This would be the result:
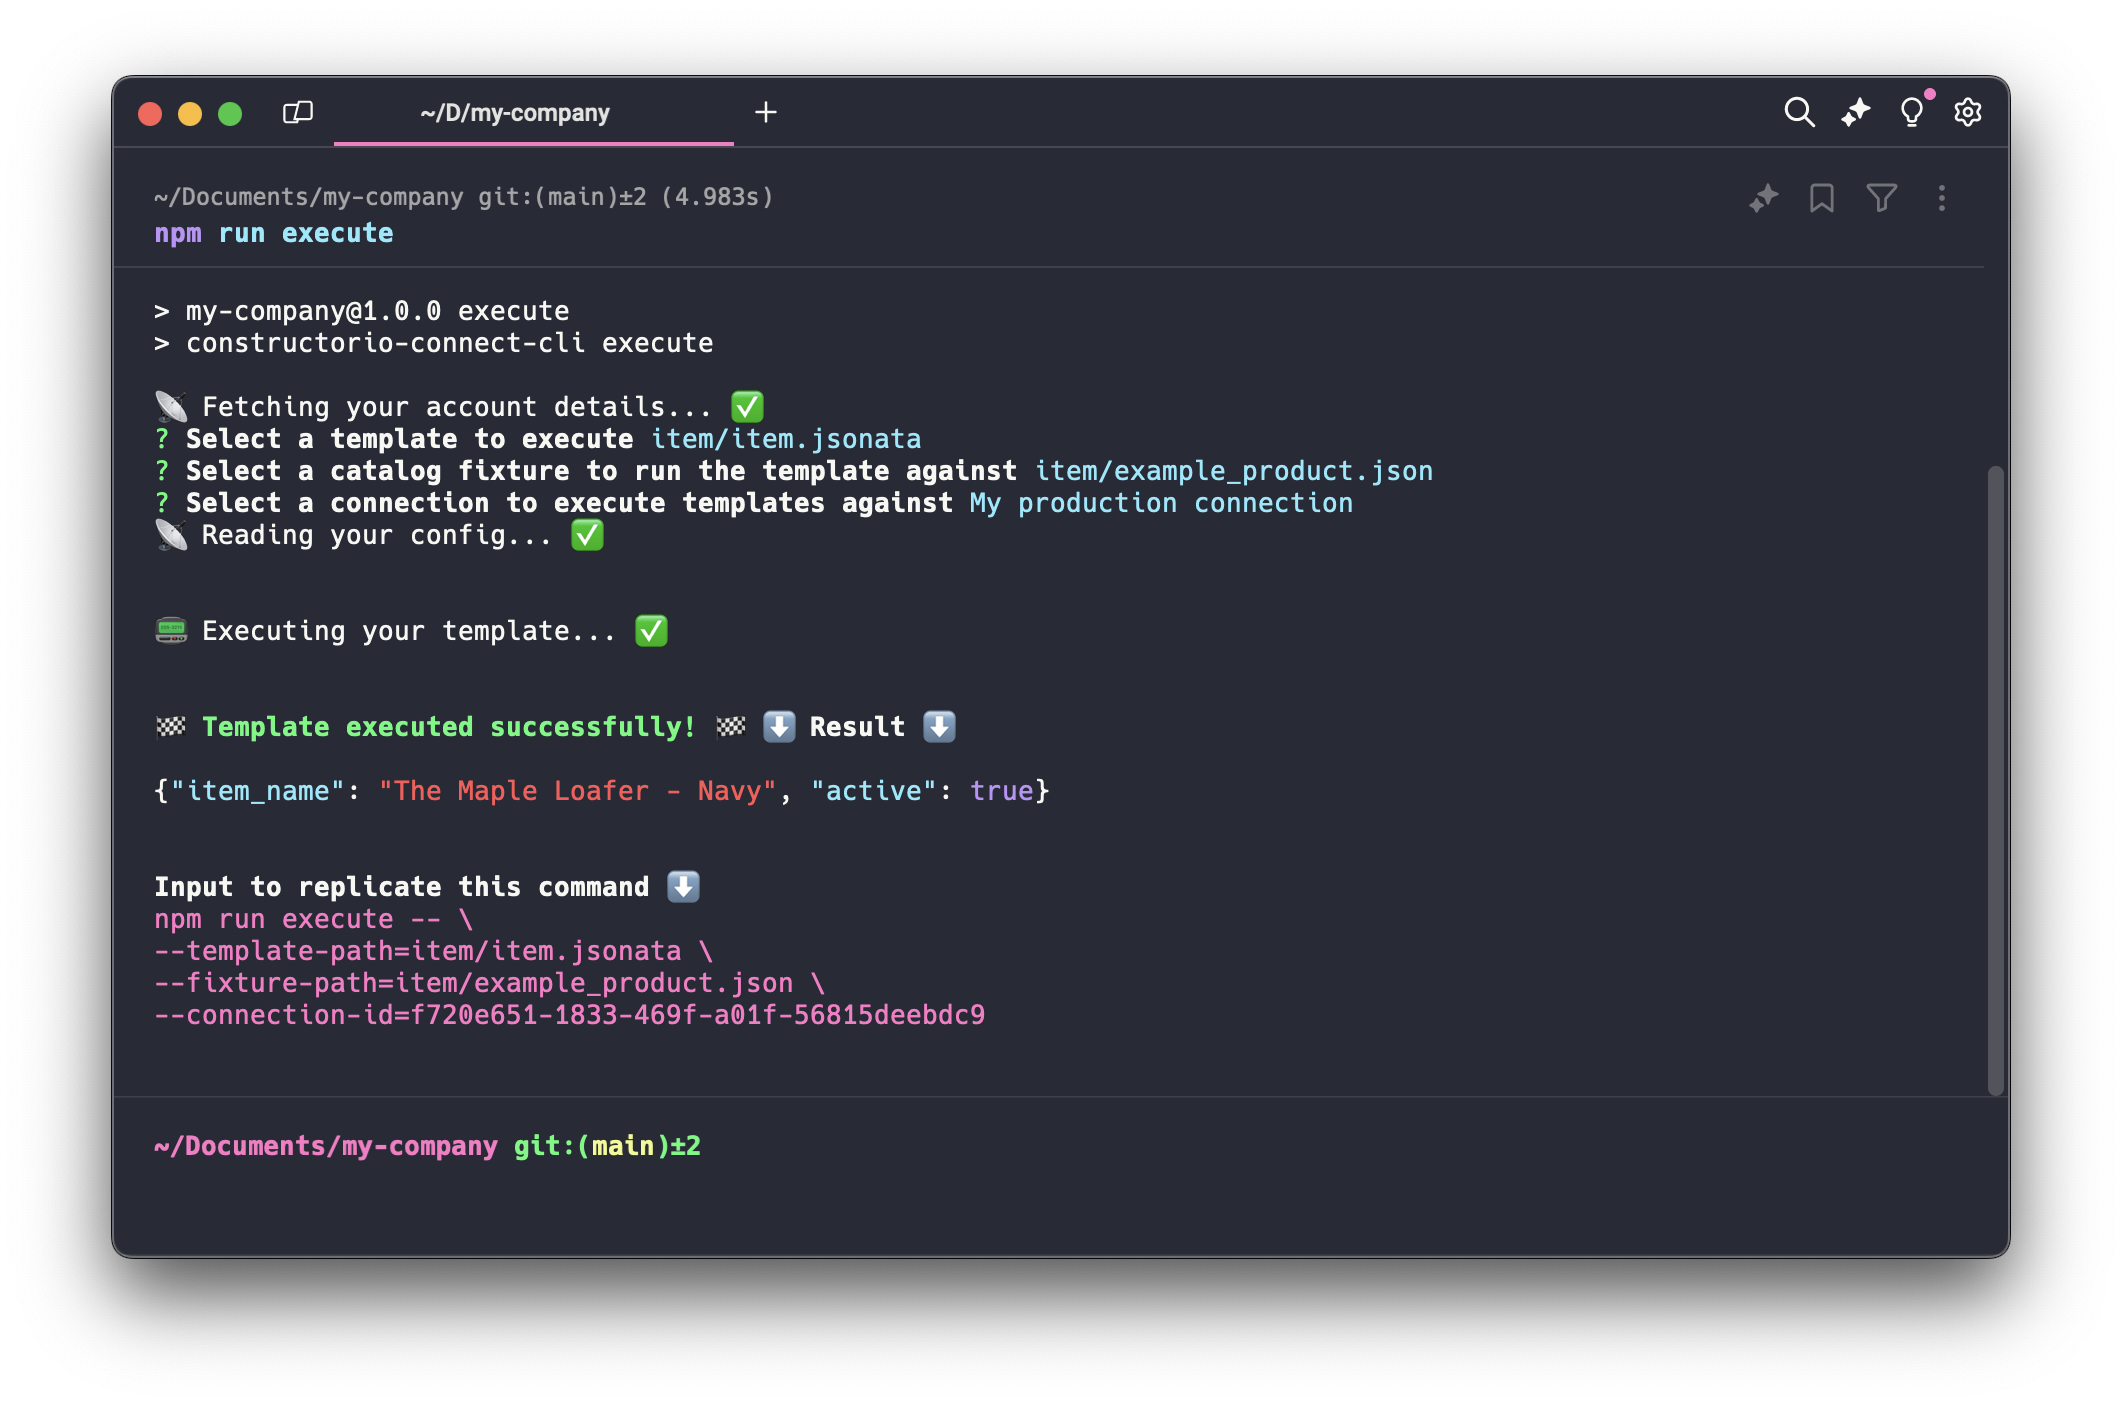
Executing the item template
After running the command, you'll need to specify a few of inputs:
- Which template to execute. This defines which template file should be executed (from the templates you have in
src/templates). - Which fixture to use. This defines which fixture will be used during this execution, which directly influences what data the connector will have access to.
- Which connection to use. This defines which connection will be used during execution, which influences a couple of parameters such as the partner and environment.
Want to save time?You do not need to run
npm run executeand select the inputs every time. Instead, you can copy the input to replicate the command shown after the execution and it will directly execute your template without prompting you.If you use VSCode, you can simply hit F5 to immediately execute the template file you currently have opened.
Execution result
If the template execution succeeds, resulting data will show. This data will be merged into the base transformations the connector already executes, so you can effectively customize all transformations previously done by the connector.
Take this valid item group template, for example:
{
  "id": data.handle,
  "name": data.title
}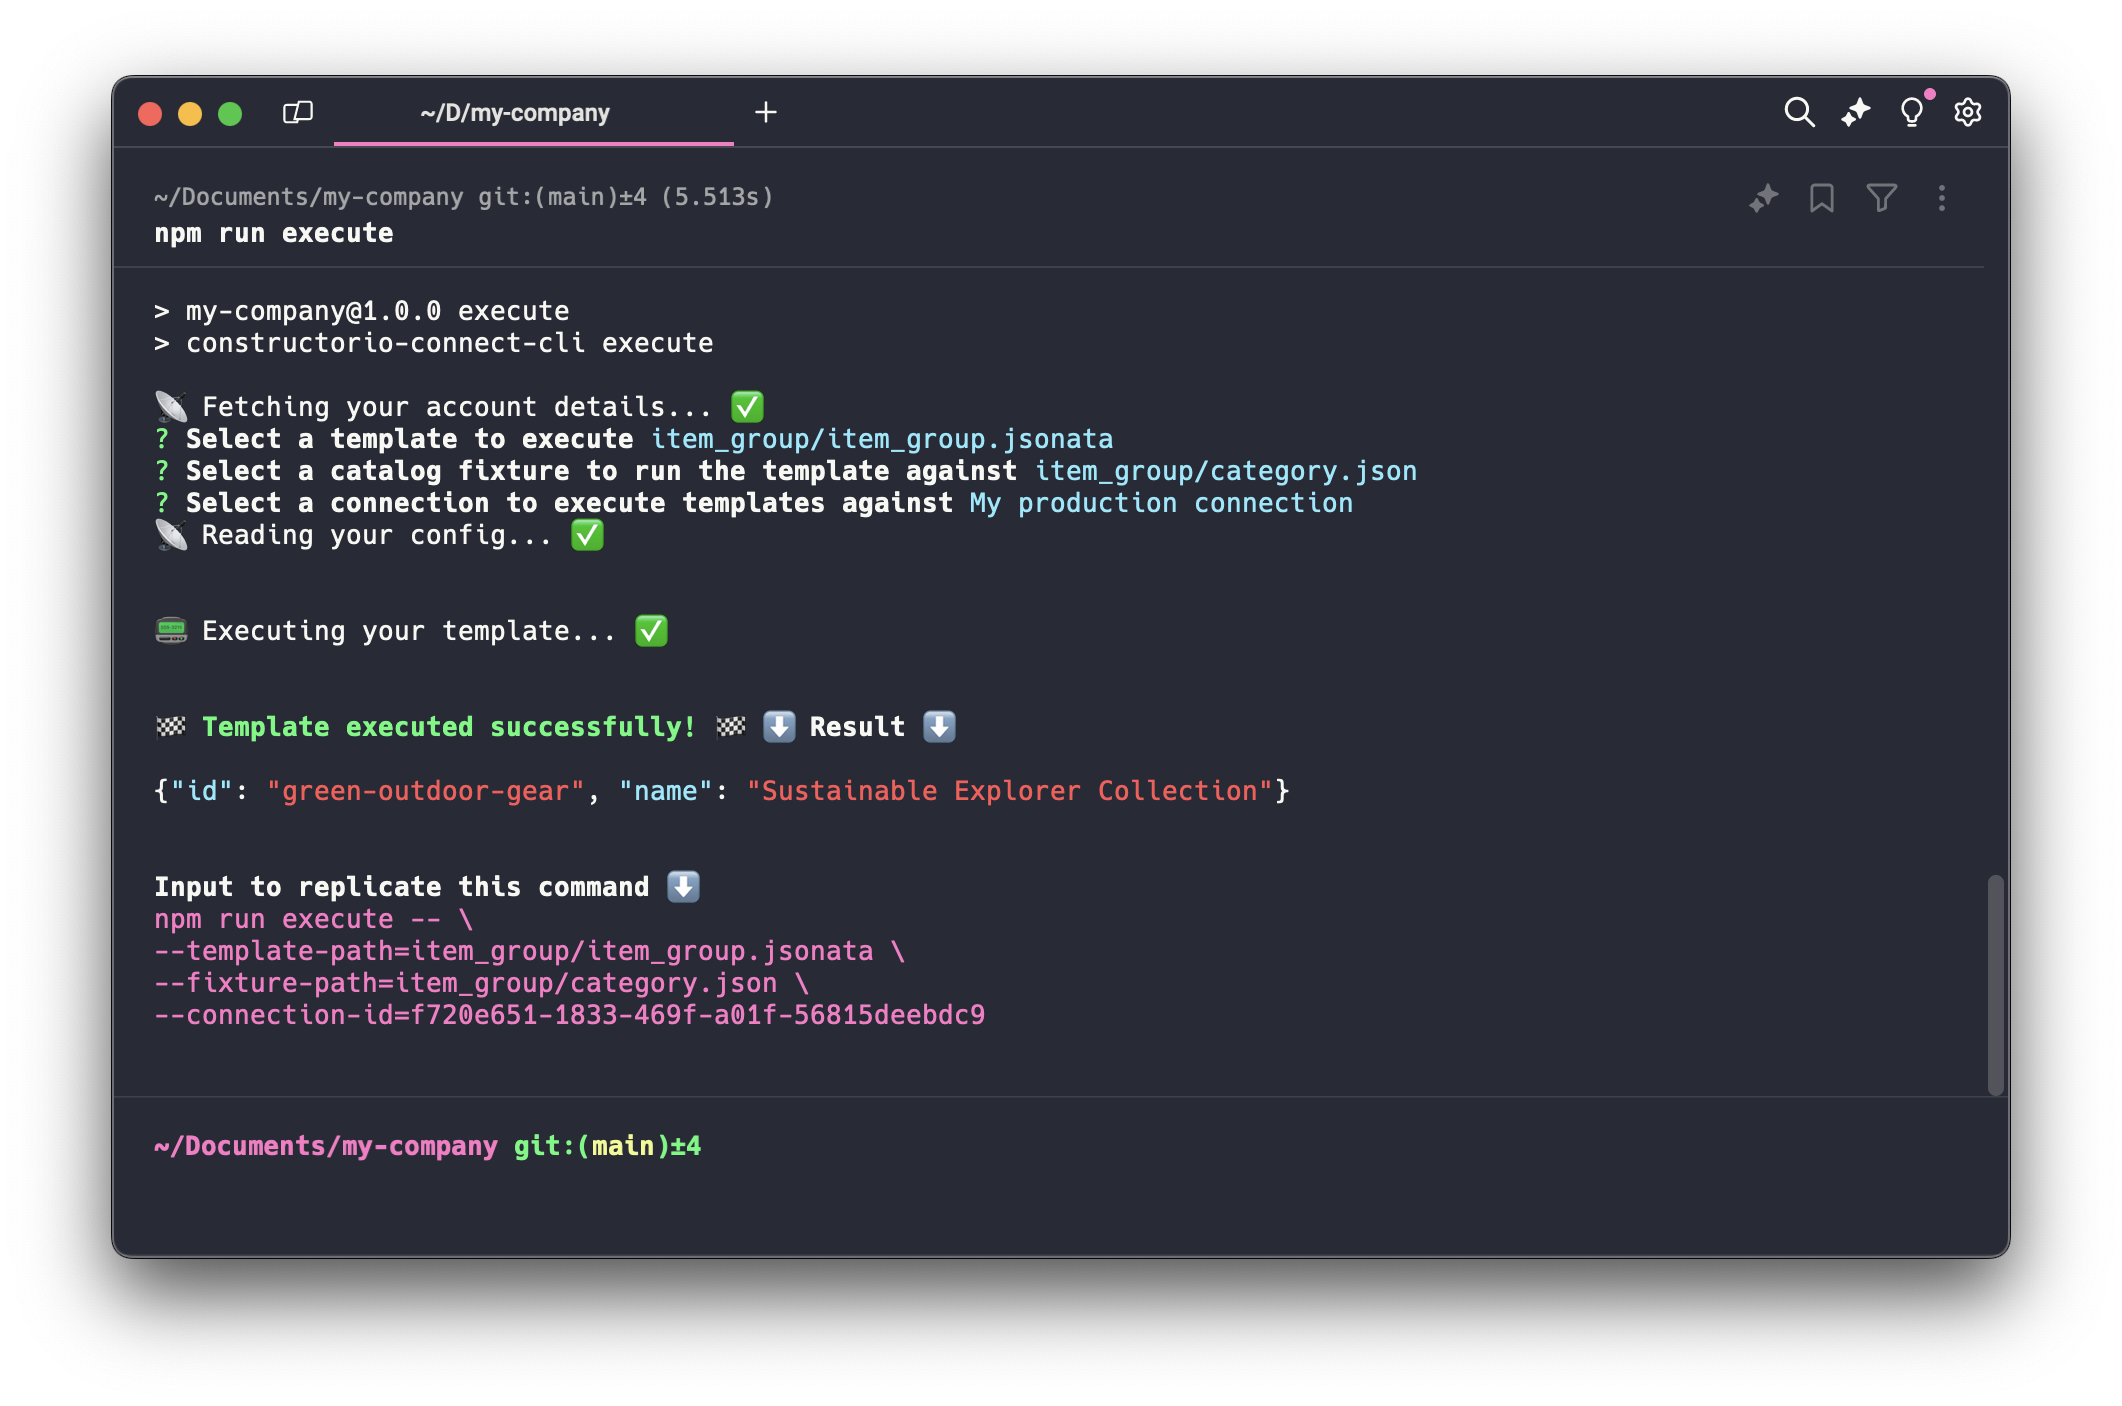
Successful item group transformation
However, if the template fails due to any reason (for example, invalid syntax), you will see a detailed error on the CLI result showing you exactly why it failed. Note that if you forcefully deploy a broken template, the connector will fail to execute and you will be notified with a similar error via email.
Assume you have an invalid item group template where the function $foobar does not exist.
{ "id": }Upon executing this template, you will see an error:
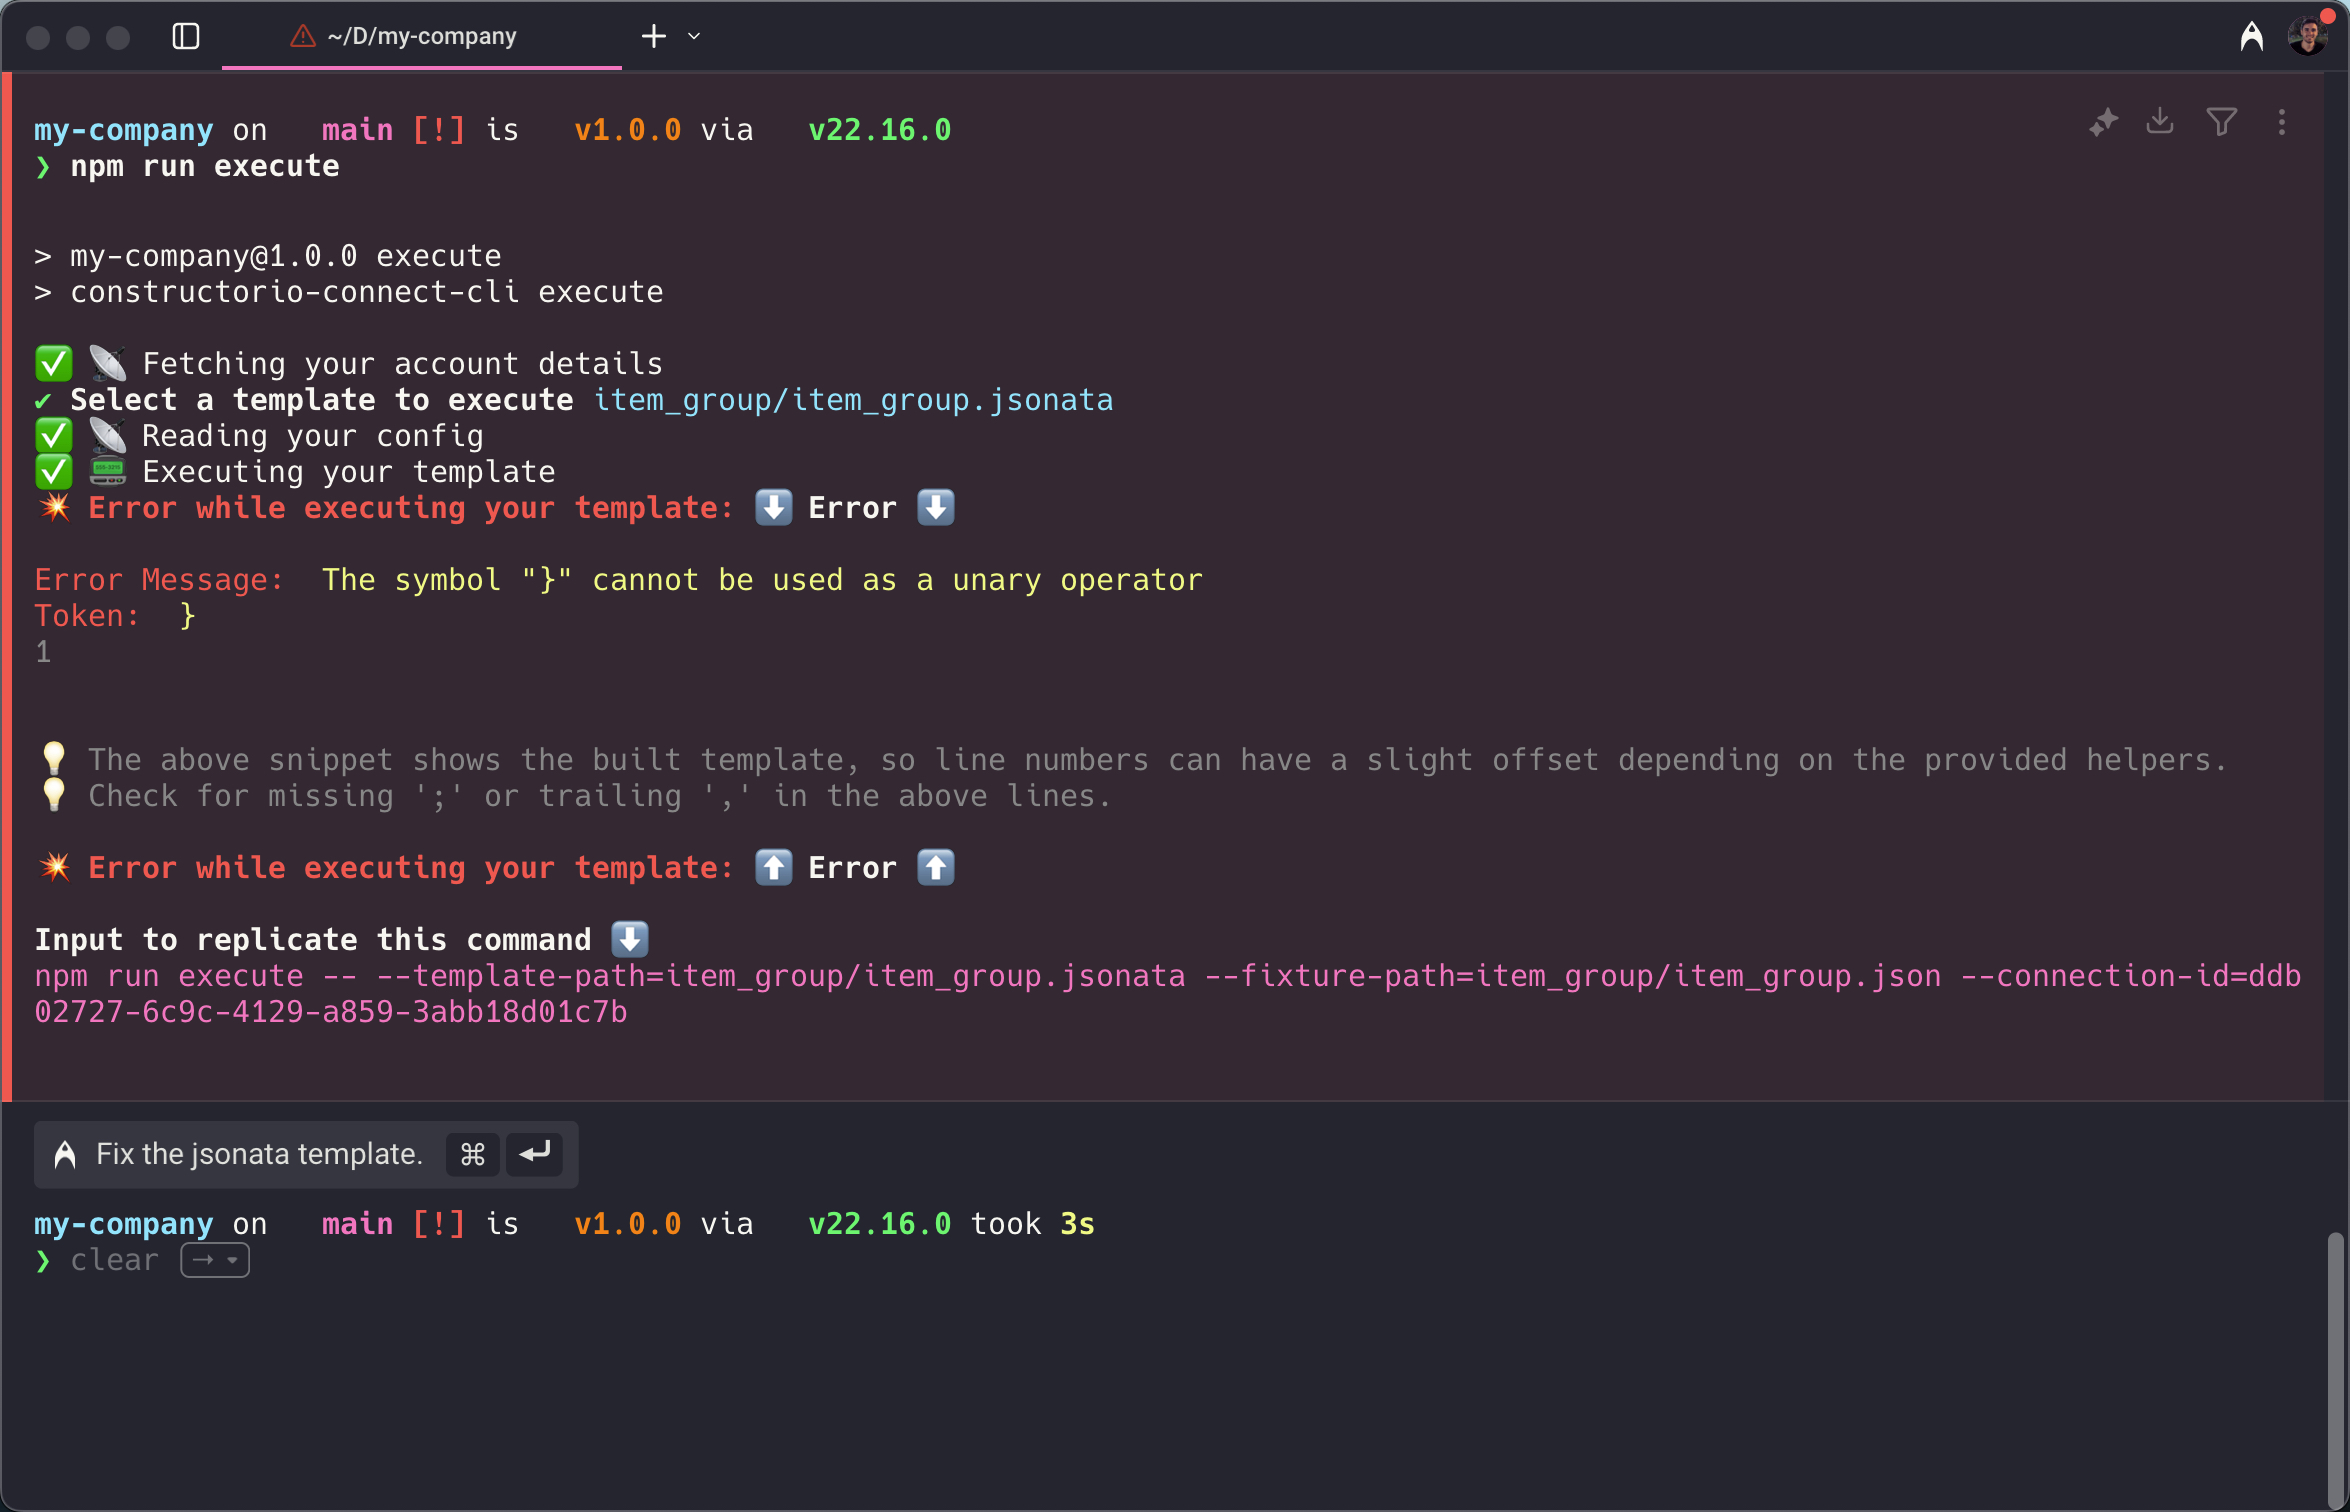
Failed item group transformation
Warnings
Whenever a template is executed, a series of validations are ran against the final result and template syntax.
If any invalid use case is detected, the Connect CLI will render warnings in the terminal during template executions.
Here are a couple of common validation scenarios you might find:
- Invalid field names that won't be ingested.
- Deprecated fields that should be updated.
- Duplicated data such as the same metadata key multiple times.
- and more.
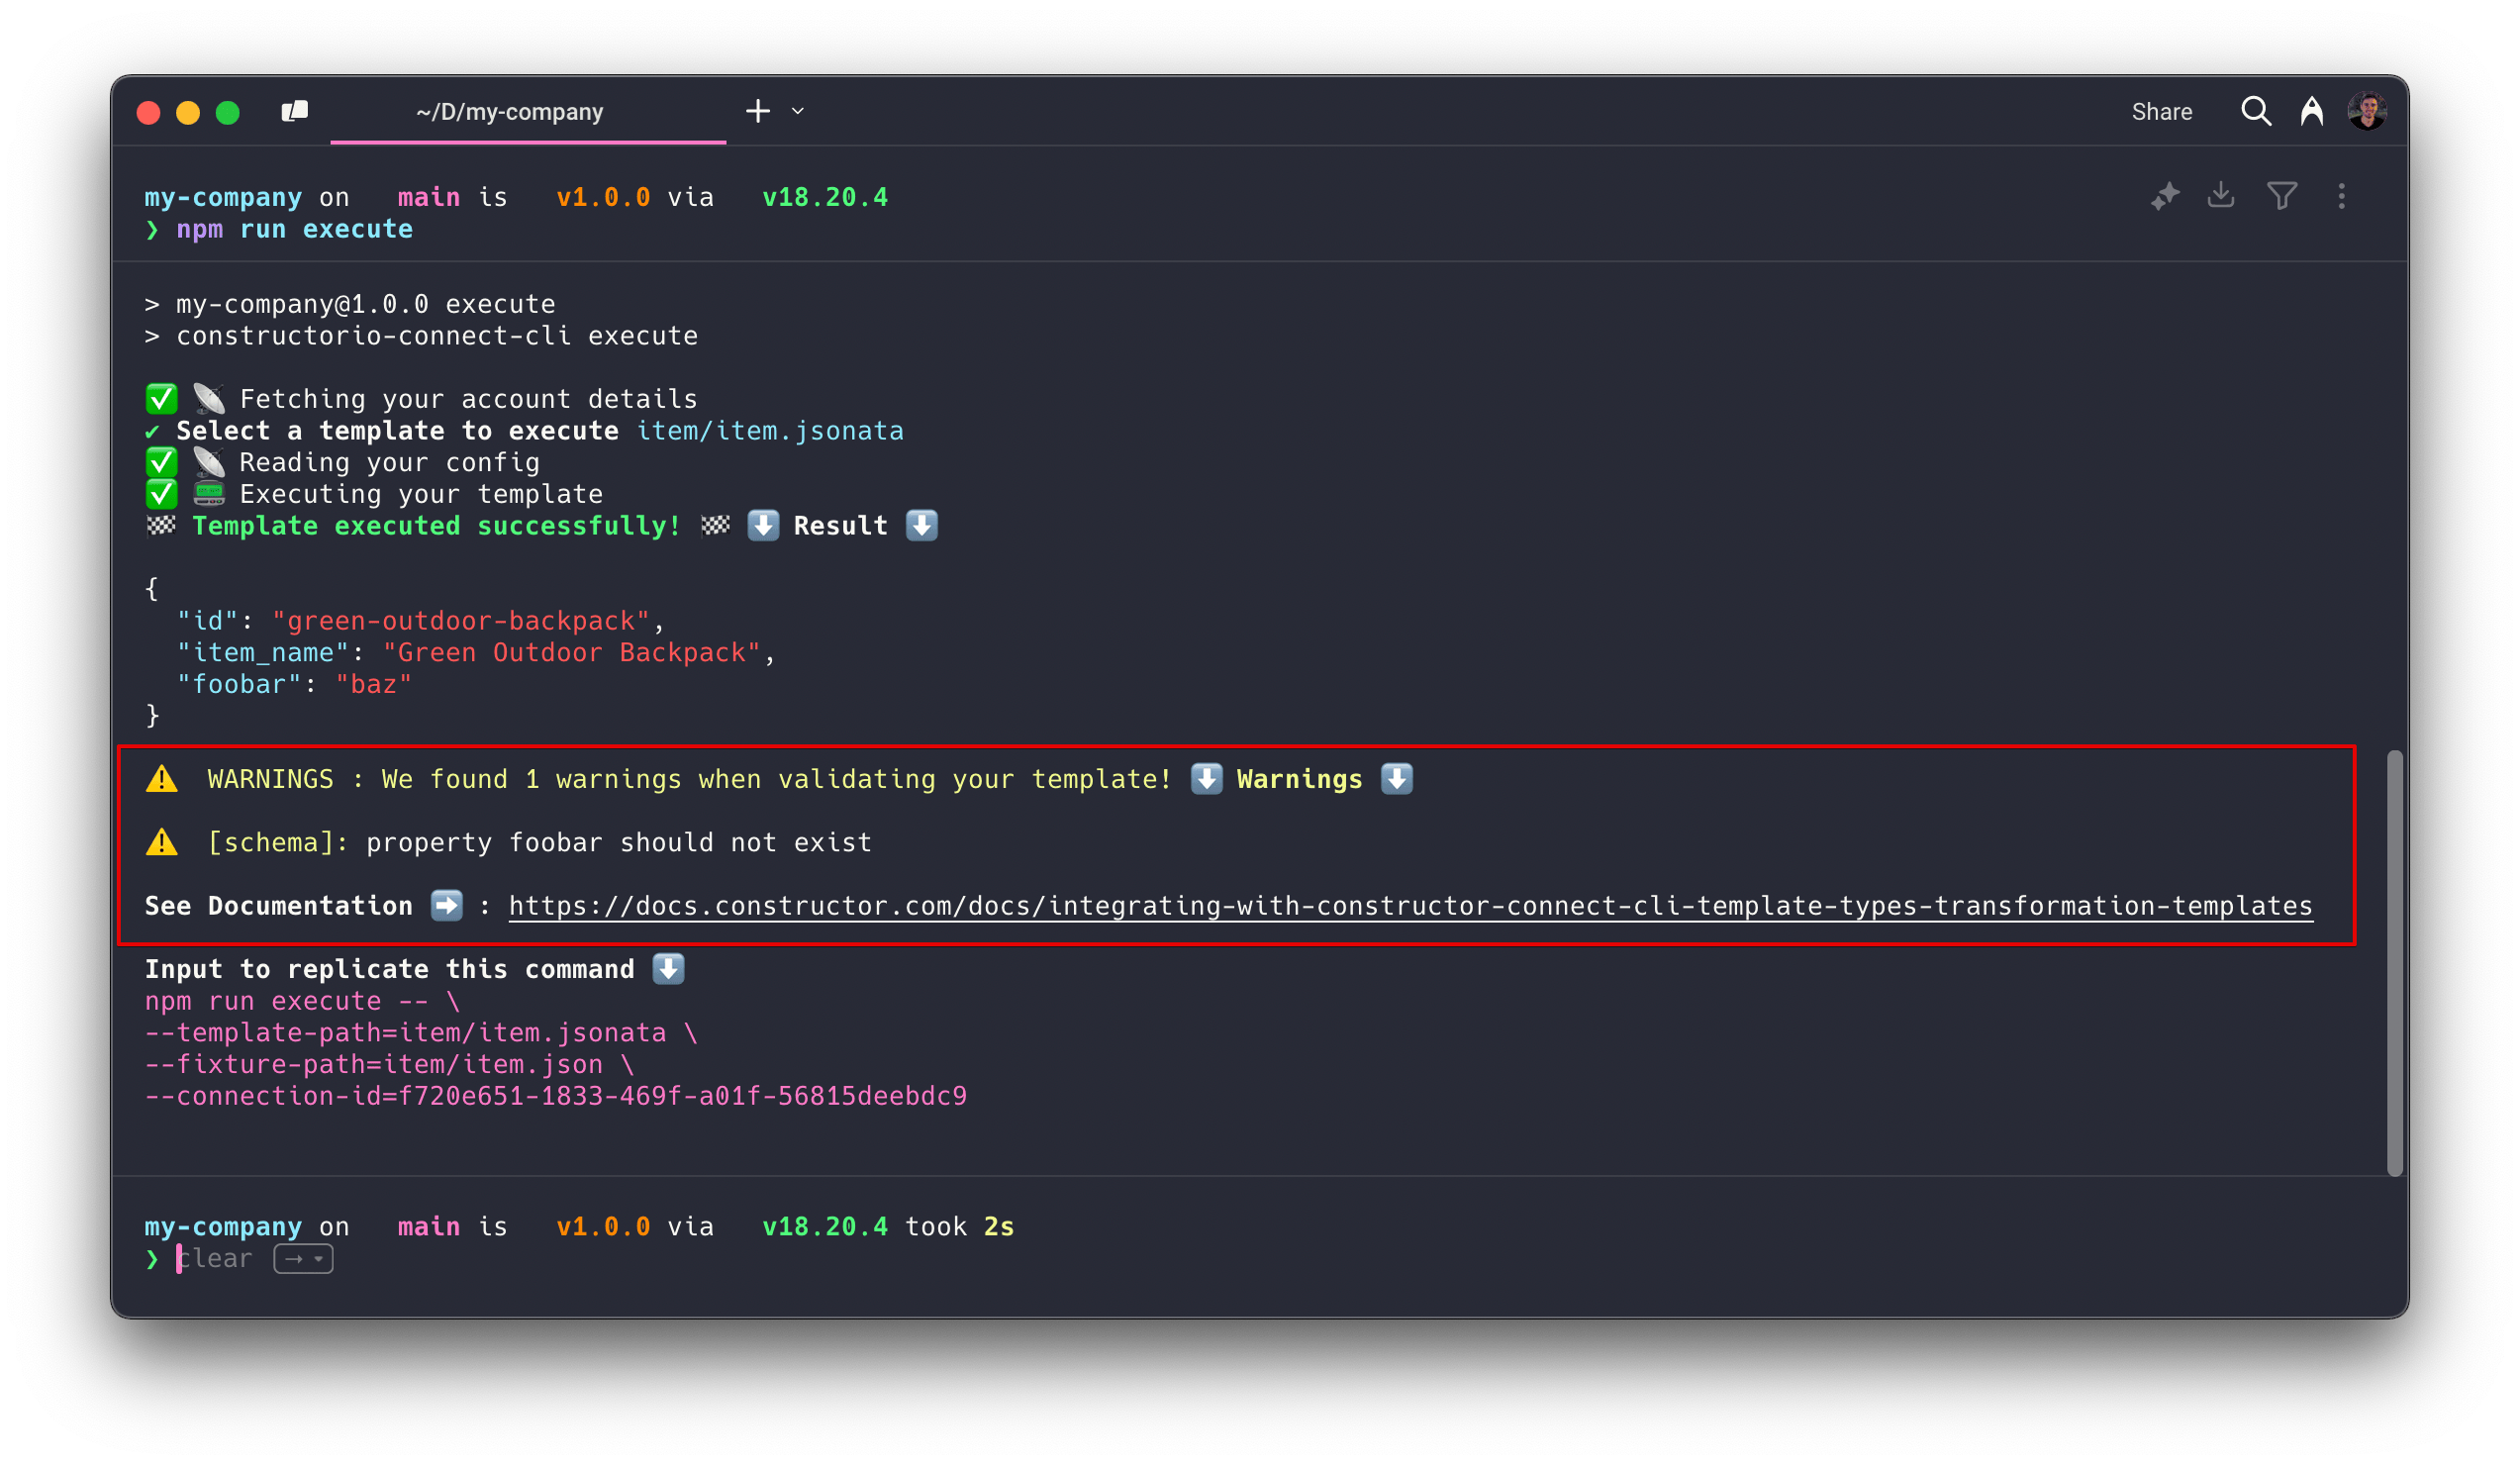
CLI rendering warnings
Step 3: Test your templates
Each repository also comes with a full test suite, built with Jest. The CLI provides you with a few helper functions in your tests to easily execute templates and customize fixture data to ensure you can write tests as easily as possible.
As you know, the value of automated tests lies in being able to execute a complex suite of tests to cover cases you have programmed rather than trying to execute a template manually multiple times to see results. This can be especially useful when making changes weeks or months after an initial change.
Similar to templates and fixtures, tests live under the test/templates folder, inside the respective template type folder.
You can execute the test suite using the test command:
npm run testThis command can take any arguments received by Jest. For example, you can filter tests to be executed with any string, such as:
npm run execute itemExample test
An initial repository includes a few example tests. Let's create a simple test to cover our item template shown in the Step 2:
import { executeTemplate, buildFixture } from "@constructor-io/constructorio-connect-cli";

describe("item", () => {
  it("should match inline snapshot", async () => {
    const result = await executeTemplate({
      type: "item",
      name: "item.jsonata",
      fixture: buildFixture("item", "example_product.json"),
    });

    expect(result).toMatchInlineSnapshot(`
{
  "active": true,
  "item_name": "The Maple Loafer - Navy",
}
`);
  });
});
After executing the tests, you will see the usual Jest output:
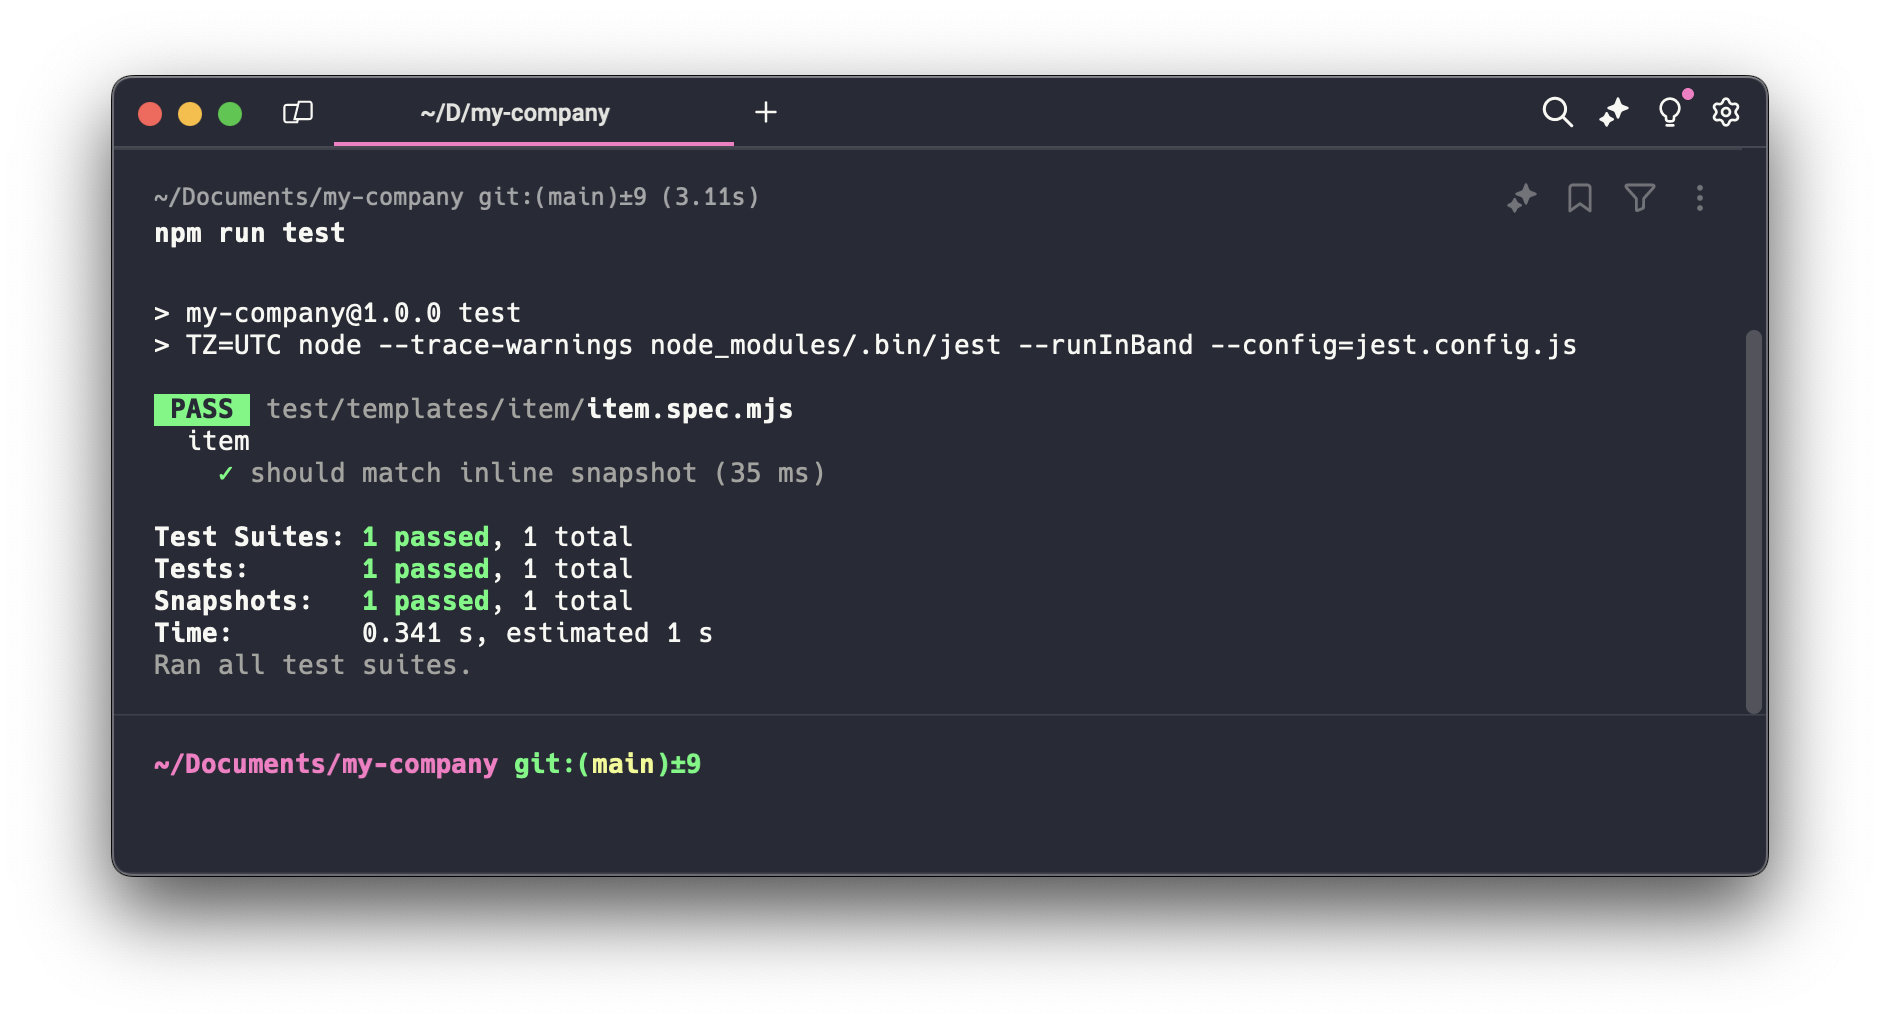
Successful test
CI/CD integration
Repositories initialized by the Connect CLI already contain a GitHub actions workflow to run your test suite once someone opens a pull request on your repository.
In case you use a different tool to host your code, it is possible to port the existing workflow to support a proper CI/CD flow.
Step 4: Deploy your templates
When you are satisfied with your templates, you can deploy them. Think of deployment as similar to a normal deployment or roll out you would do on a service—it takes place of the previous deployment and connectors will start to use the new templates once the deployment is finished.
Every deployment is tied to an environment. As such, you will be asked to specify the environment you are deploying to. Without a specified environment, the CLI will reject the deployment.
You can deploy templates using the deploy command:
npm run deploy productionNote that since version 1.15.0, the test suite will be ran before doing the actual deployment. If any tests fail, your deployment will also fail. You can skip tests with --force:
npm run deploy production --force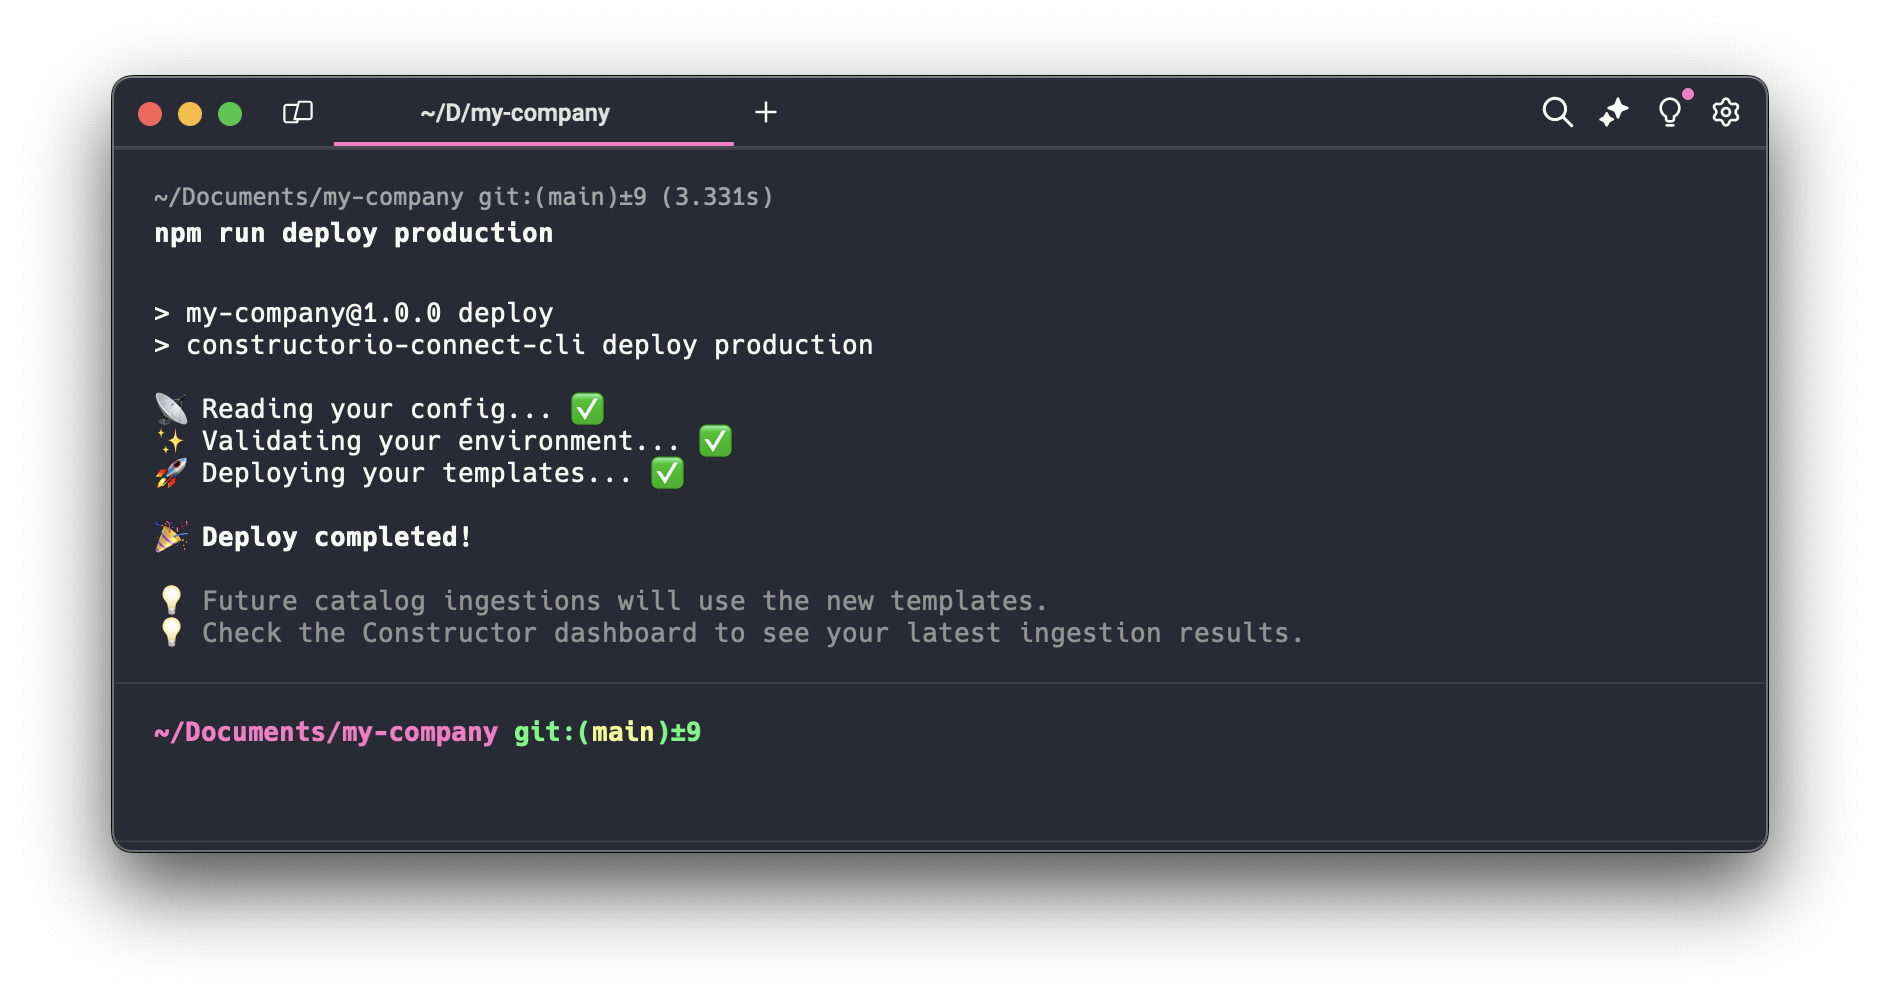
Deploying templates to development environment
Valid environments
At this time, the environment must be one of:
demo: Often used to showcase connectors.development: Changes you make during development to actively test your integration.qa: A pre-production environment to validate your integration.production: Your live integration environment.
Step 5: Validate your data
Once the deployment has been done and the connector runs to ingest your catalog data, it's time to validate your changes. To see if a certain change is working as expected, you can:
Alternatively, you can also browse the Catalog Uploads page to download the raw data generated by the connector and debug your changes there.
Don't forget to configure your indexesOnce you have made your changes and validated them, it's time to configure your index.
For instance, if you desire a certain field to be returned in the API responses, then you'll need to make it displayable.
Please take a look at Configuring Searchabilities to get started.
Updated 5 months ago