Slot future items
Learn how to slot items that are not yet live in the catalog
Available for Search, Browse, Campaigns, Collections, Recommendations, and Facet pages.
Merchandisers can slot upcoming items that are not yet part of the catalog in Constructor. These may be items that are synced overnight, over a weekend, or during a holiday. This saves the merchandiser from having to log in to Constructor during those moments to quickly slot the new items. Instead, they can do them ahead of time.
How it works
To slot a future item, a merchandiser will create a slotting rule and enter the future item's id. This id must match the id that will be uploaded to Constructor. Once the item appears in the catalog in Constructor, it will appear in the slotted position.
Merchandisers can slot future items individually or upload a CSV of future items with the items' id and desired position. Merchandisers can also configure start and end dates for future items and apply the rule to specific segments.
Create a slotting rule for future item(s)
Step 1: Choose a context
Context refers to the results page for which you are creating the rule. For example, Search, Browse Category, Facet, or Collection.
Want to slot future items across multiple contexts?You’ll need to create a campaign. Follow steps 1-3 in our campaign article, then jump back here to steps 2-4.
- Select Workspace in the side menu of your Constructor dashboard, then select Searchandising.
- Select + Add New Rule in the top-right corner of the page.
- On the pop-up, choose the context for which you wish to create the rule.
- Search: Allows you to choose a query to create a single rule for Search and Autosuggest.
- Browse: Allows you to choose between creating a rule for Category or Facet. You will then be prompted to select the categories and/or facets.
- Campaign: Allows you to create a rule that applies to multiple contexts, such as query results pages, categories, and facet pages.
Want to slot a future item in a recommendation pod?You can access the searchandising menu for a specific pod from the Recommendations section of the Constructor dashboard. Select Add new in the top-right corner, then Recommendations rule. From there, select your desired pod.
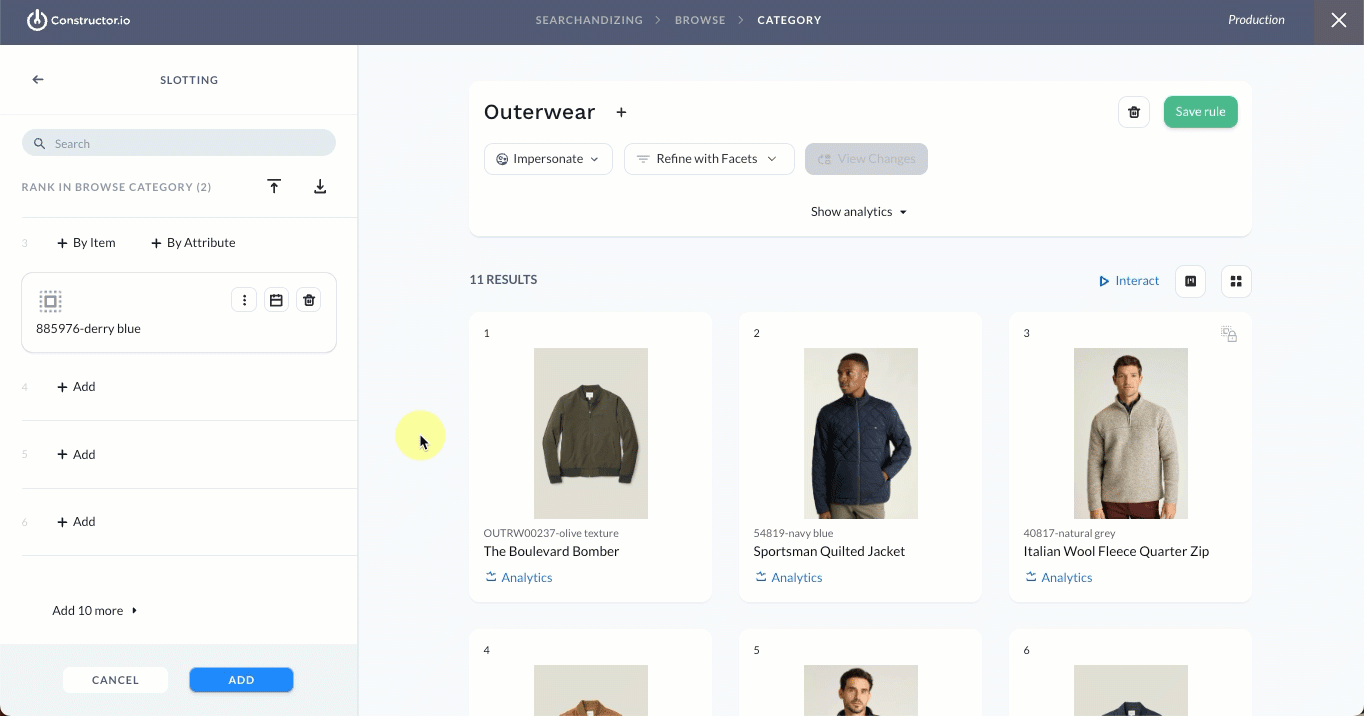
Step 2: Configure rule
- Select Add Rules & Content.
- In the Rerank section, select Slotting.
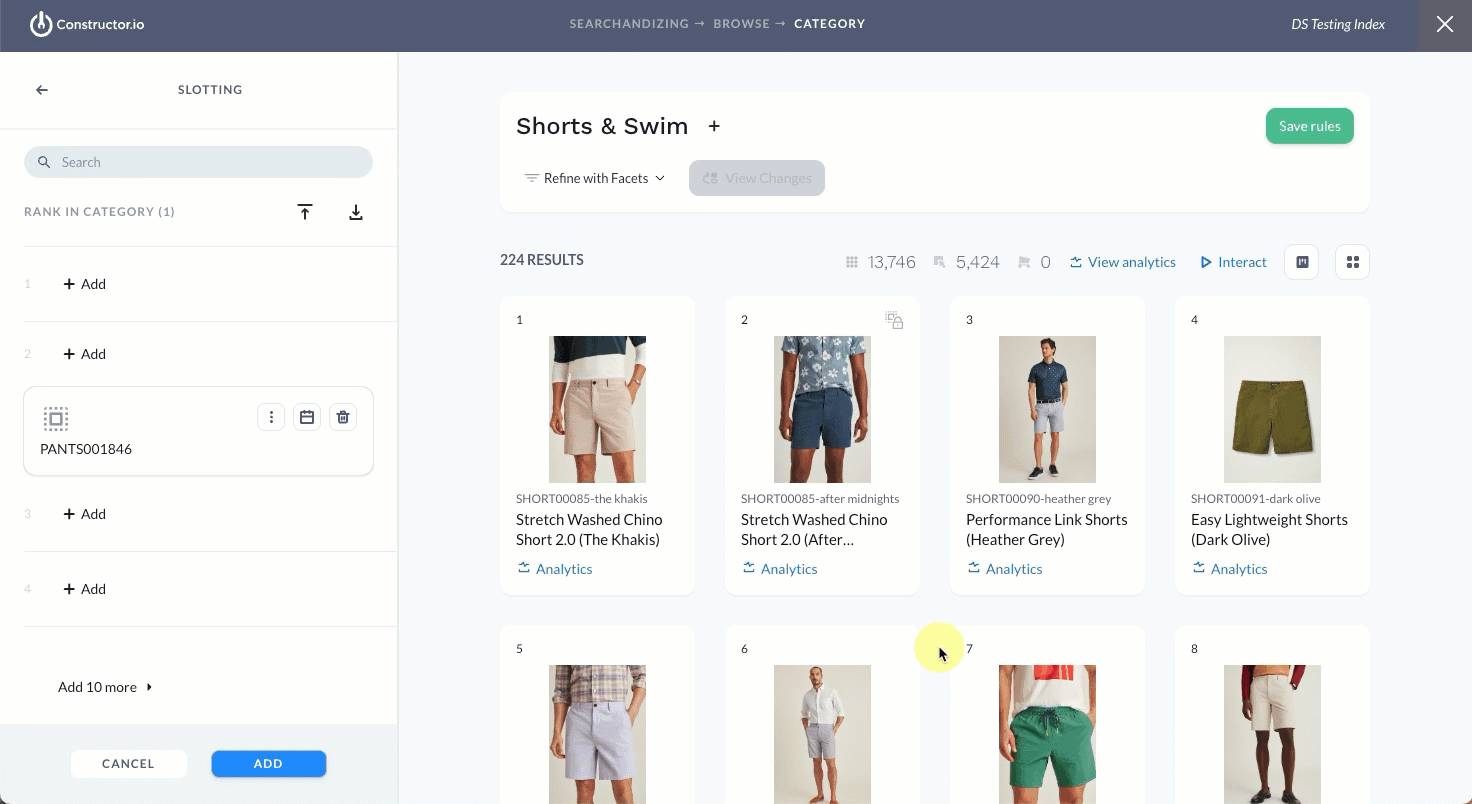
- Locate the position where you wish to slot the item, then hover over +Add.
- Select + By Item.
- Want to upload multiple items? Select the upload icon at the top of the side menu to upload a CSV file. Recommended: Download the CSV template to specify all future items and desired positions.
- Enter the item ID. As you do, a drop-down menu will appear.
- Select the top-most option, Add the item with id [item id].
- A slotted placeholder will appear in the position you selected.
Add a user segment
You can apply the rule to a specific subset of users by defining a user segment. Available segments include geo-based segments, segments provided using the us parameter, and AI-generated segments (e.g., RFM, Affinity, etc.).
- In the side menu, select the three-dot icon on the slotted item, then select User segment.
- On the pop-up, select your desired segment.
- Use the Search field to search for the segment by name.
- Select any of the segment categories (e.g., Affinity, RFM, Location, etc.) to view available segments.
- Note: Analytics for a segment reflect the behavior of the users included in the individual segment over the last 30 days.
- Select Continue in the bottom-right corner of the pop-up.
Add a start/end date
You can add a Start Date and End Date to the rule, which allows you to time box the rule's impact on returned results. Dates are not required. You can also define a start date without a set end date, and vice versa.
- Select the calendar icon on slotted item in the side menu. This launches a pop-up where you can define start and end dates and times.
- Dates: Select either Date field to launch a calendar picker, which allows you to choose a specific start and end date.
- Time: Once you define a date, a default start or end time will populate in the drop-down fields to the right of the date fields. Use these drop-downs to edit the start and end times (hour, minute, AM/PM). Times are displayed in the time zone shown below the fields.
- Once done, select Apply in the bottom-right corner of the pop-up.
Step 3: Save the rule

- Continue slotting item variants, as desired.
- Once done, select Add in the bottom-left corner of the page. This will take you back to the list of all rules and content for the context.
- Select Save Rules in the top-right corner of the page to save the rule.
Updated 6 months ago