Create facet rules for a specific results page
Learn how to change or hide facet groups and options on query, category, and collection pages
With facet rules, merchandisers can apply a single set of rules—such as slotting or blocklisting a facet group and/or option—to a specific results page. This allows merchandisers to curate the order in which facet groups appear on that specific results page. These are the filter options that shoppers use to refine the items they’re viewing.
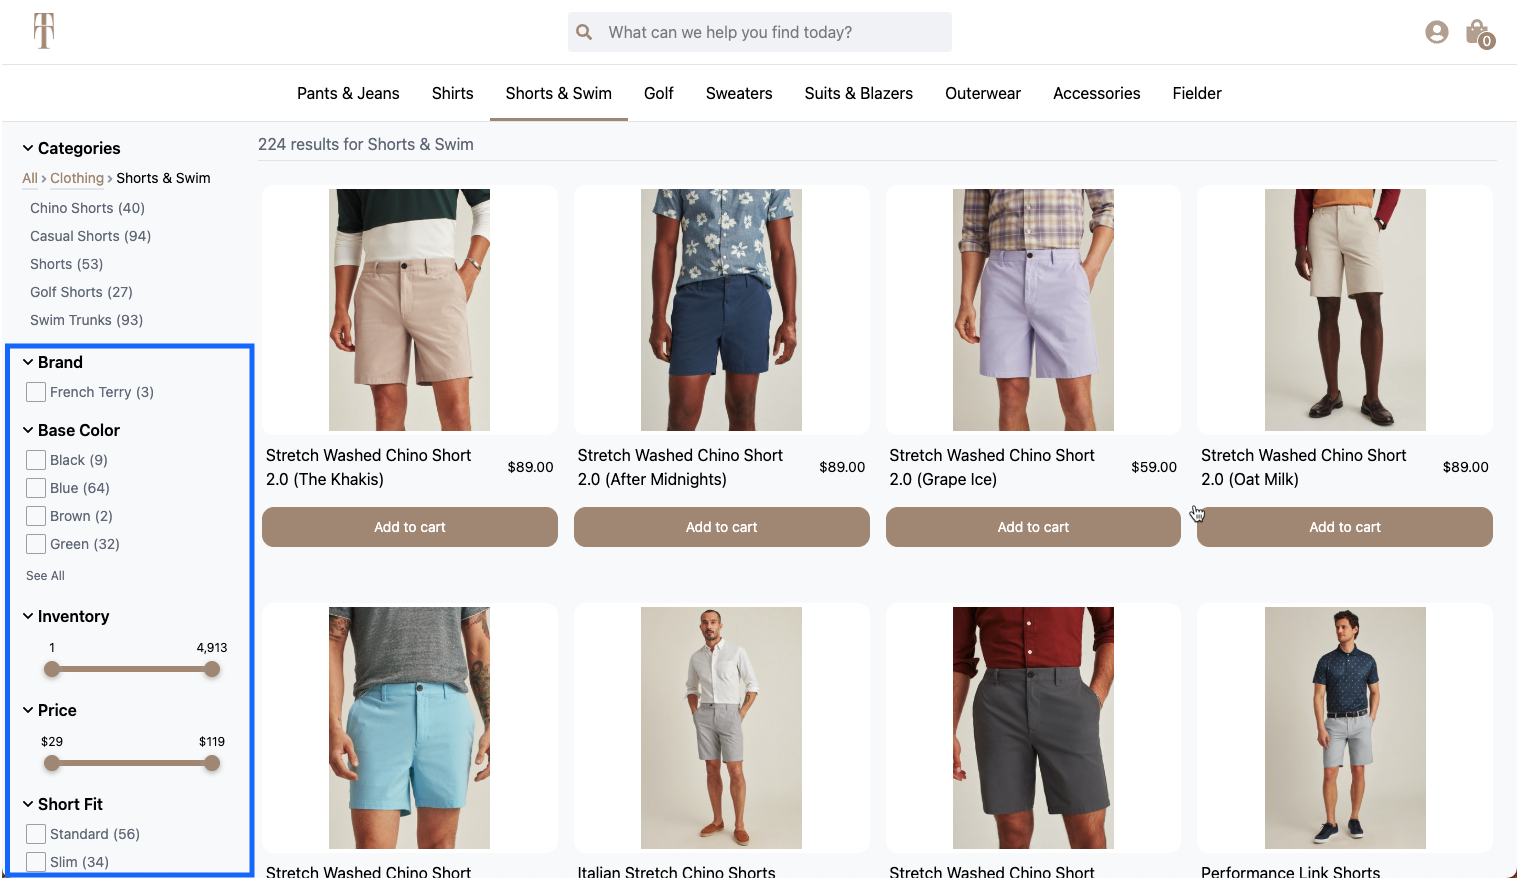
Facet groups and options on the left side of a category page.
Create facet rules for a specific results page
Step 1: Choose the context
Context refers to the results page for which you are creating the rule. For example, a search results page, browse category page, collection, or facet page.
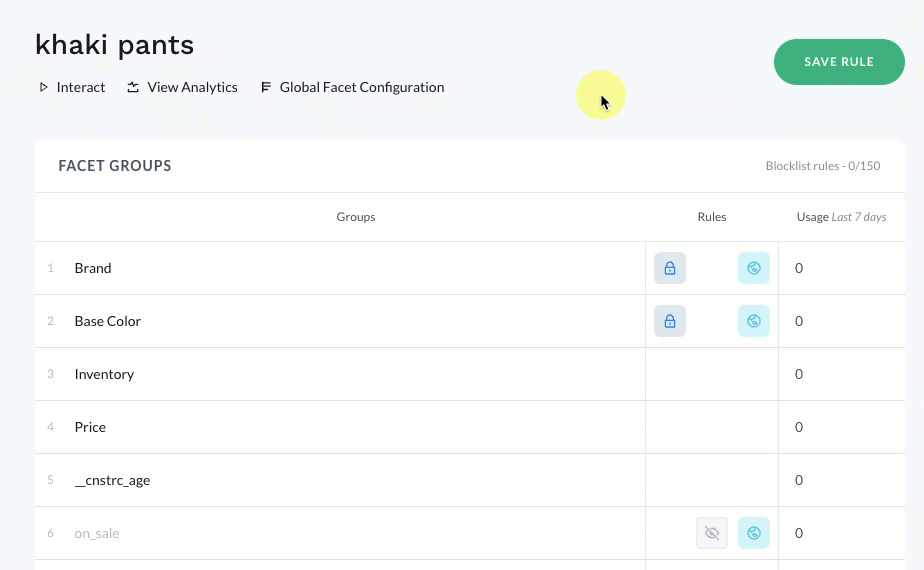
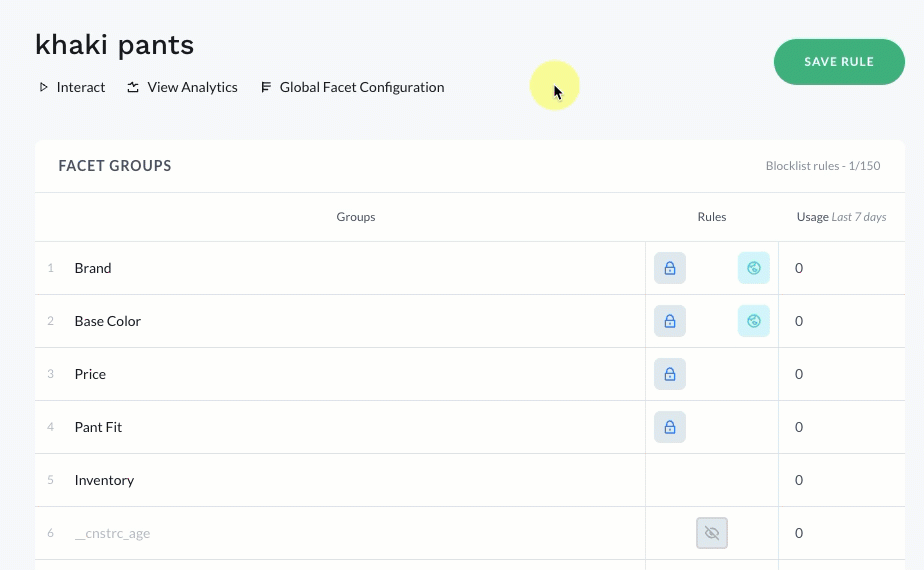
- Select Workspace in the side menu of the Constructor dashboard, then select Facets.
- Select + Add New Rule in the top-right corner of the page.
- On the pop-up, choose the results page experience for which you wish to order facets:
- Search: Enter the search query in the field provided, then select Continue.
- Browse: Enter the category name in the field provided or select it from the drop-down menu, then select Continue.
- Collections: Select the collection from the drop-down menu, then select Continue.
Step 2: Define facet order and visibility
On this page, you can dictate the order in which facets appear on the left side of the results page for the specific search query, browse category, or collection page you selected.
Move the position of a facet group
- Hover over the desired facet group.
- Locate and select the up/down arrows located in the Rules column for that row.
- Select Move to position.
- Enter the new position in the field provided.
- Select the green checkmark.
Facet groups with defined positions will appear in that position on corresponding results pages. All other facets will be dynamically ordered by Constructor’s facet group sorting algorithm.
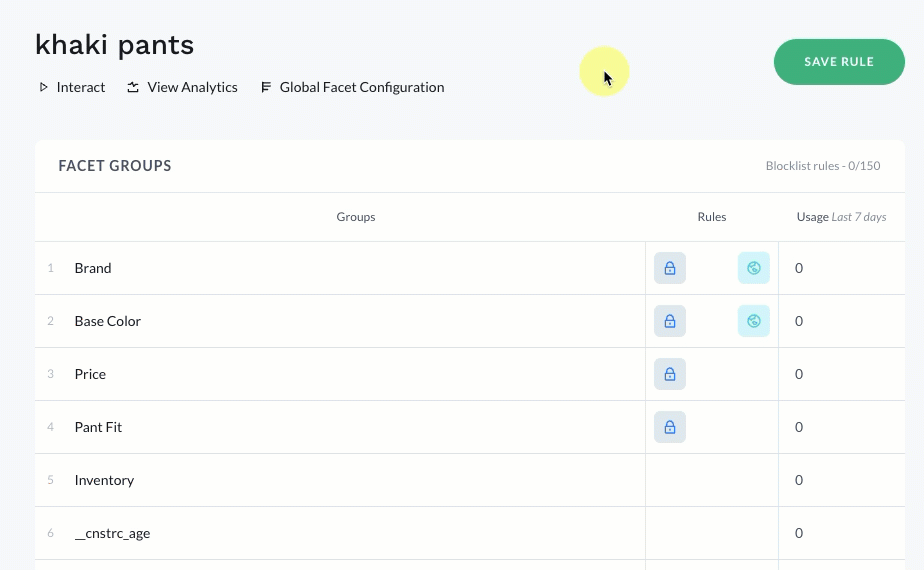
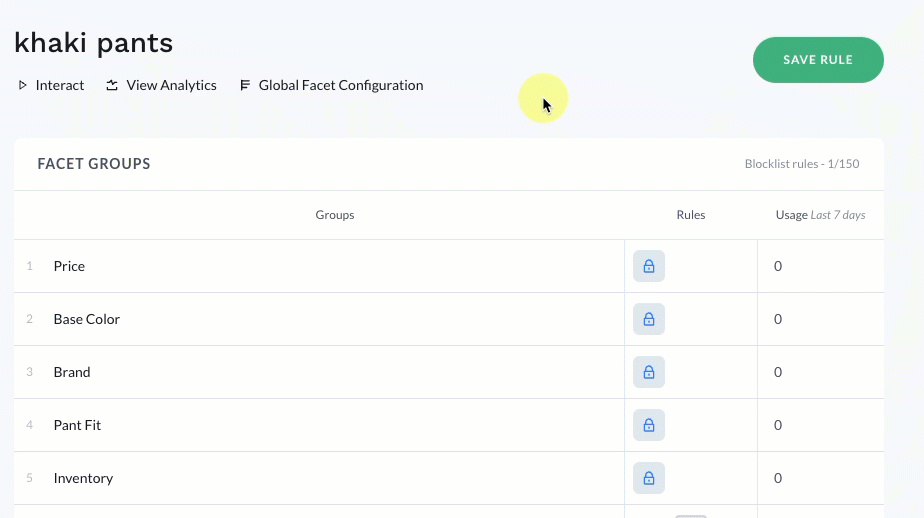
A note on locked positionsA lock icon indicates the facet’s position was previously specified, either on this page or on a global level. You can still change the position by selecting the lock and then following steps 3-5 outlined above.
Edit a global facet group position
Facets that display a globe icon in the Rules column indicate positions defined on the global level. This means that the facet group has that position across all browse category, collection, and search query results pages.
However, you can overwrite a global rule for a specific search result, browse category, or collection page.
- Hover over the desired facet group.
- Locate and select the up/down arrows located in the Rules column for that row.
- Select Move to position.
- Enter the new position in the field provided.
- Select the green checkmark.
Change the position of a global facetSelect the globe icon to visit the global facet configuration page where you can make changes to the facet’s global position. Please note: At this time, only admins can make changes to global facet configurations.
Hide a facet group
If you hide a facet group on a specific search query, browse category, or collection results page, it will only appear hidden on that page.
- Hover over the desired facet group.
- Locate and select the eye icon located in the Rules column for that row. Once hidden, the eye icon will show a line through it.
- To make a hidden facet group visible again, select the eye icon with a line through it.
Step 3: Define facet option order and visibility (optional)
In addition to dictating the order of facet groups, you can also define the order for options within that group. For example, a beauty retailer can move their own brand into the first position within the brand facet for better visibility.
- Hover over the desired facet group.
- Select View Options.
- To move a facet option, hover over the option and select the up/down arrows located in the Rules column for that option.
- Select Move to position.
- Enter the new position in the field provided.
- Select the green checkmark.
- To hide a facet option, hover over the option and select the eye icon located in the Rules column for that option.
- Select the facet group name in the top-left corner of the list to navigate back to the list of facet groups.
Once you have defined the preferred order for facets, select Save Rule in the top-right corner of the page.