Configure a display ad placement
Display Ad placements allow companies to designate specific locations around their website and/or app where advertisers can display sponsored content.
Companies can have and maintain multiple ad placements across their website, including their homepage, specific browse or category pages, as well as product listing pages.

Once you have created a placement, you will need to add it to your website. Learn more here.
Step 1: Navigate to Display Ad settings

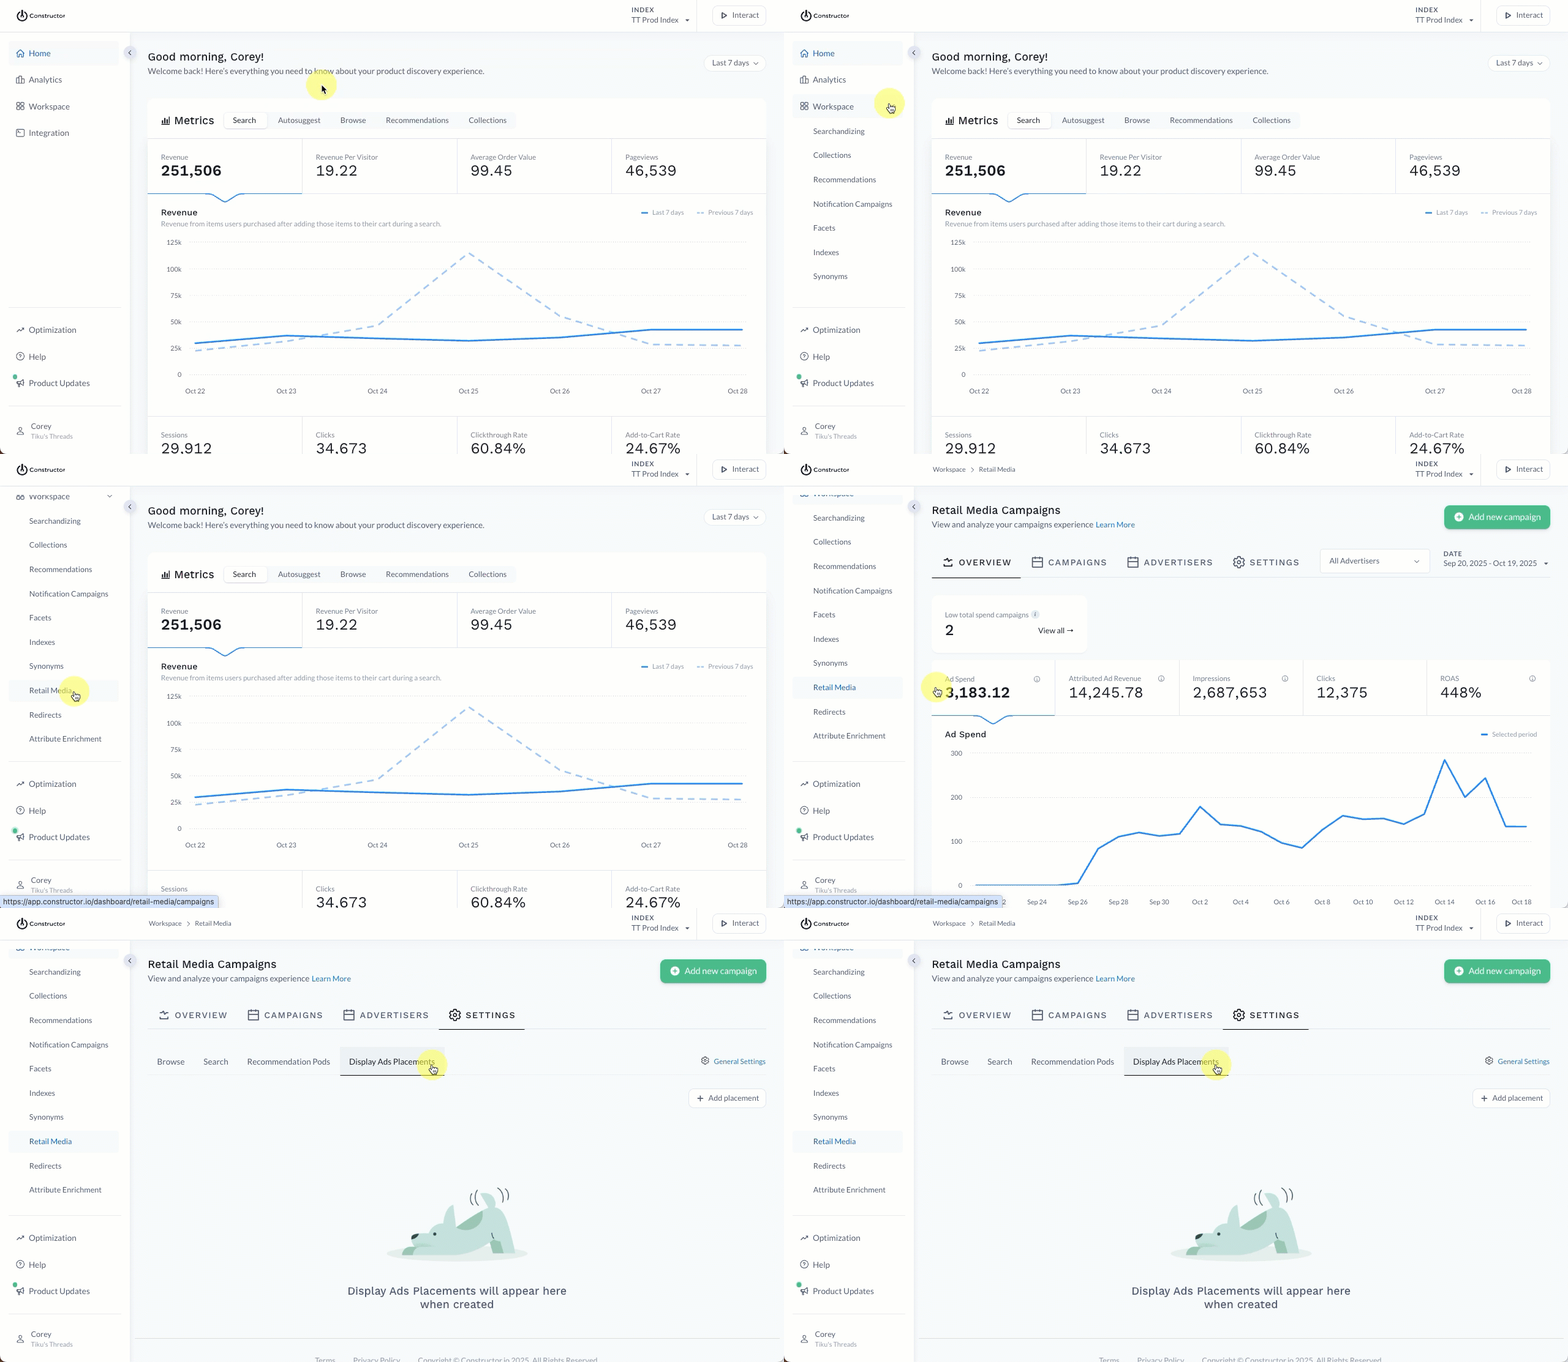
- Select Workspace in the side menu of the Constructor dashboard, then select Retail Media.
- Select Settings at the top of the listing.
- Select the Display Ads Placement tab.
Step 2: Configure display ad placement

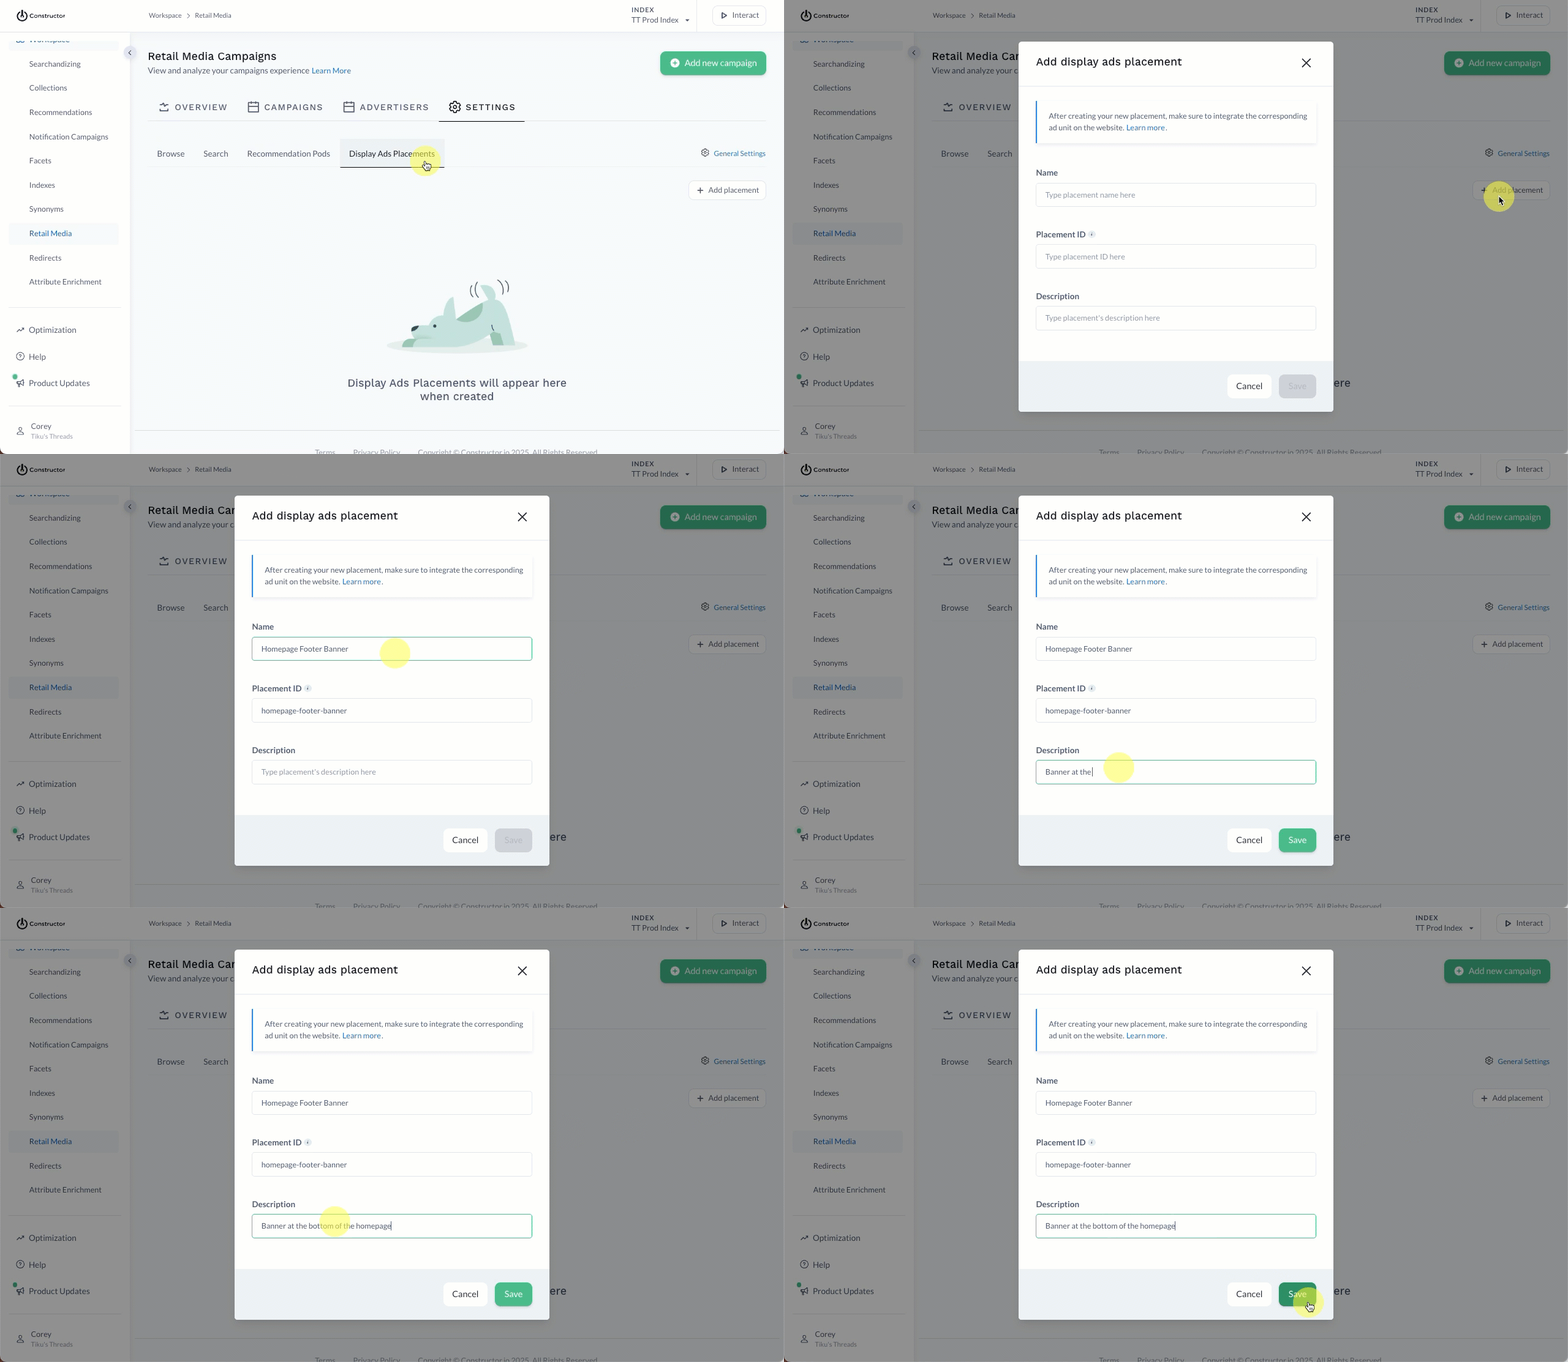
- Select + Add placement on the right side of the page.
- On the pop-up, complete the following fields:
- Name: Enter a name for the placement.
- Placement ID: This ID will automatically populate based on the placement name. For example, if you enter “Homepage Banner” as the placement name, then “homepage-banner” will automatically populate as the placement ID. You can modify the populated ID.
- Description: Enter details about the placement in the field provided.
- Select Save in the bottom-right corner of the pop-up.
Step 3: Add the placement to your website
Once you create a display ad placement, you will need to add the placement to your website design. You will need the placement_id which will be included in the request to the Display Ads API. Learn more here.
Updated 2 months ago