Create a display ad campaign
Display ad campaigns allow advertisers to bid for ad placement in key areas around a company’s website, such as the homepage or the top of a product listing page.
Campaigns can also target placements on specific browse category and/or search results pages. For example, a fashion brand that carries women’s cashmere sweaters might bid for ad placement at the top of a fashion retailer’s Women’s Sweaters category page.
Companies can create display ad campaigns on behalf of advertisers from the Constructor dashboard.
Step 1: Choose the campaign type

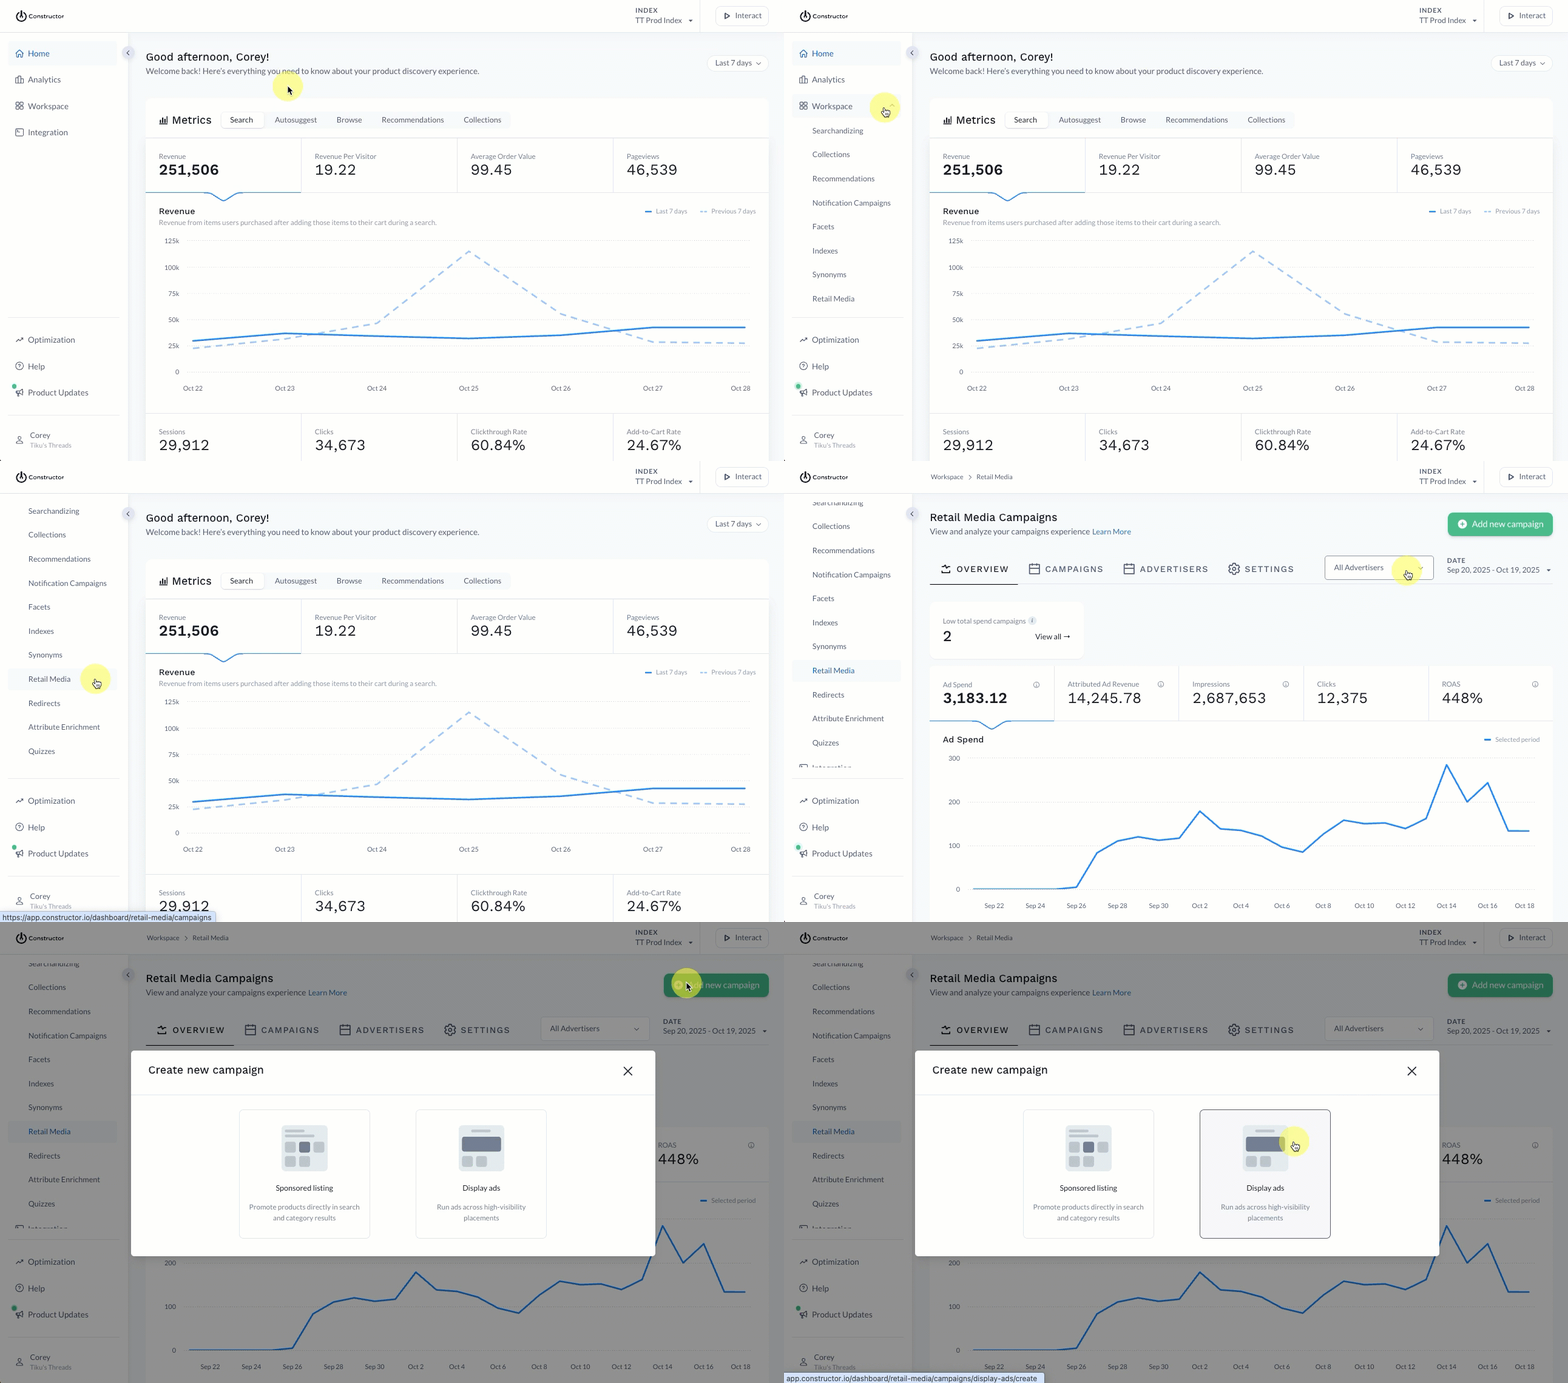
- Select Workspace in the side menu of the Constructor dashboard, then select Retail Media.
- Select Add new campaign in the top-right corner of the page.
- On the pop-up, select Display ads.
Step 2: Enter campaign date(s) and budget

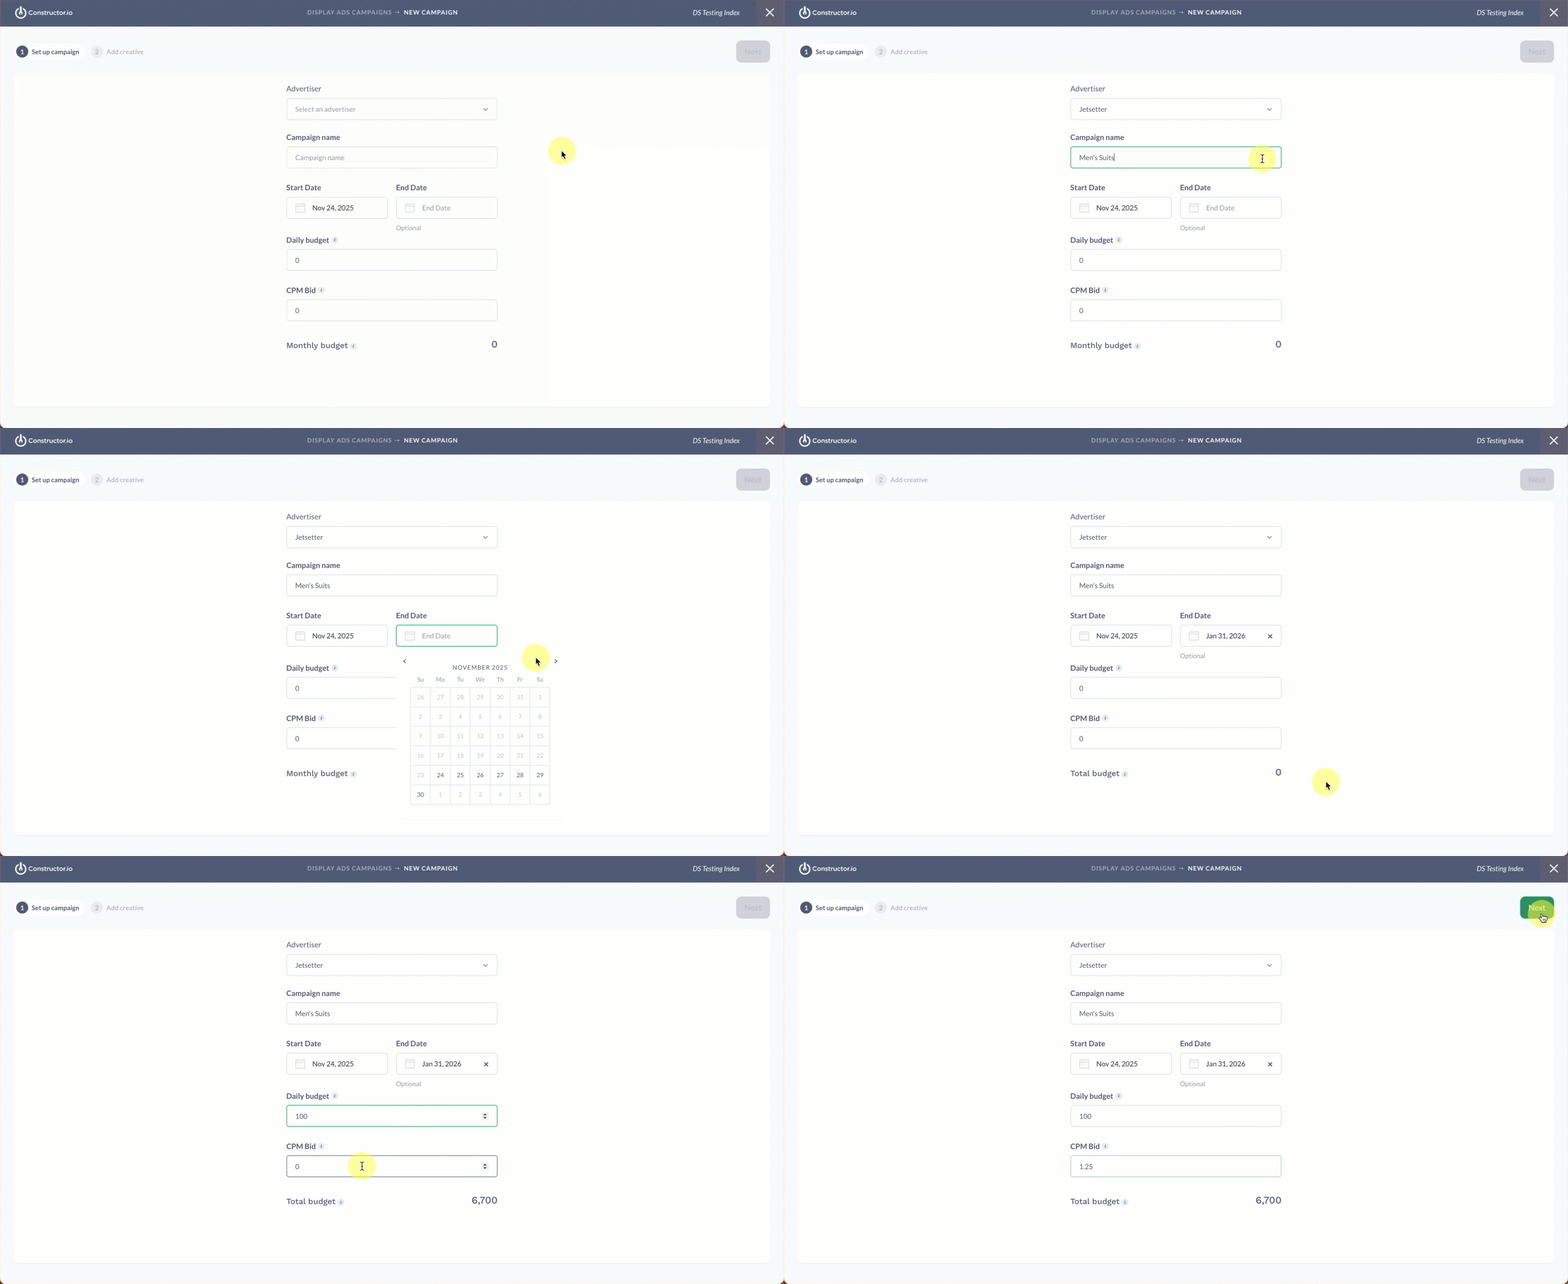
- Select the campaign Advertiser from the drop-down provided. You can use the search field to filter the list of options, or scroll to locate the advertiser.
- Enter a Campaign name in the field provided. This is the name that will appear in the main Retail Media campaign listing.
- Enter a Start Date and End Date for the campaign. Select either field to launch a calendar picker which will help you select your desired date(s).
- Enter a Daily budget in the field provided. Budget currency is the selected index’s currency.
- Enter the CPM bid in the field provided.
- CPM means
cost per mille, or thousand, meaning the amount you are willing to pay for 1,000 impressions of an ad, regardless of clicks or conversions. - For example, a CPM of 5.00 means a willingness to pay up to $5 for every 1,000 impressions the ad receives.
- CPM means
- Select Next in the top-right corner of the page.
Step 3: Add campaign creative assets

Enter campaign details
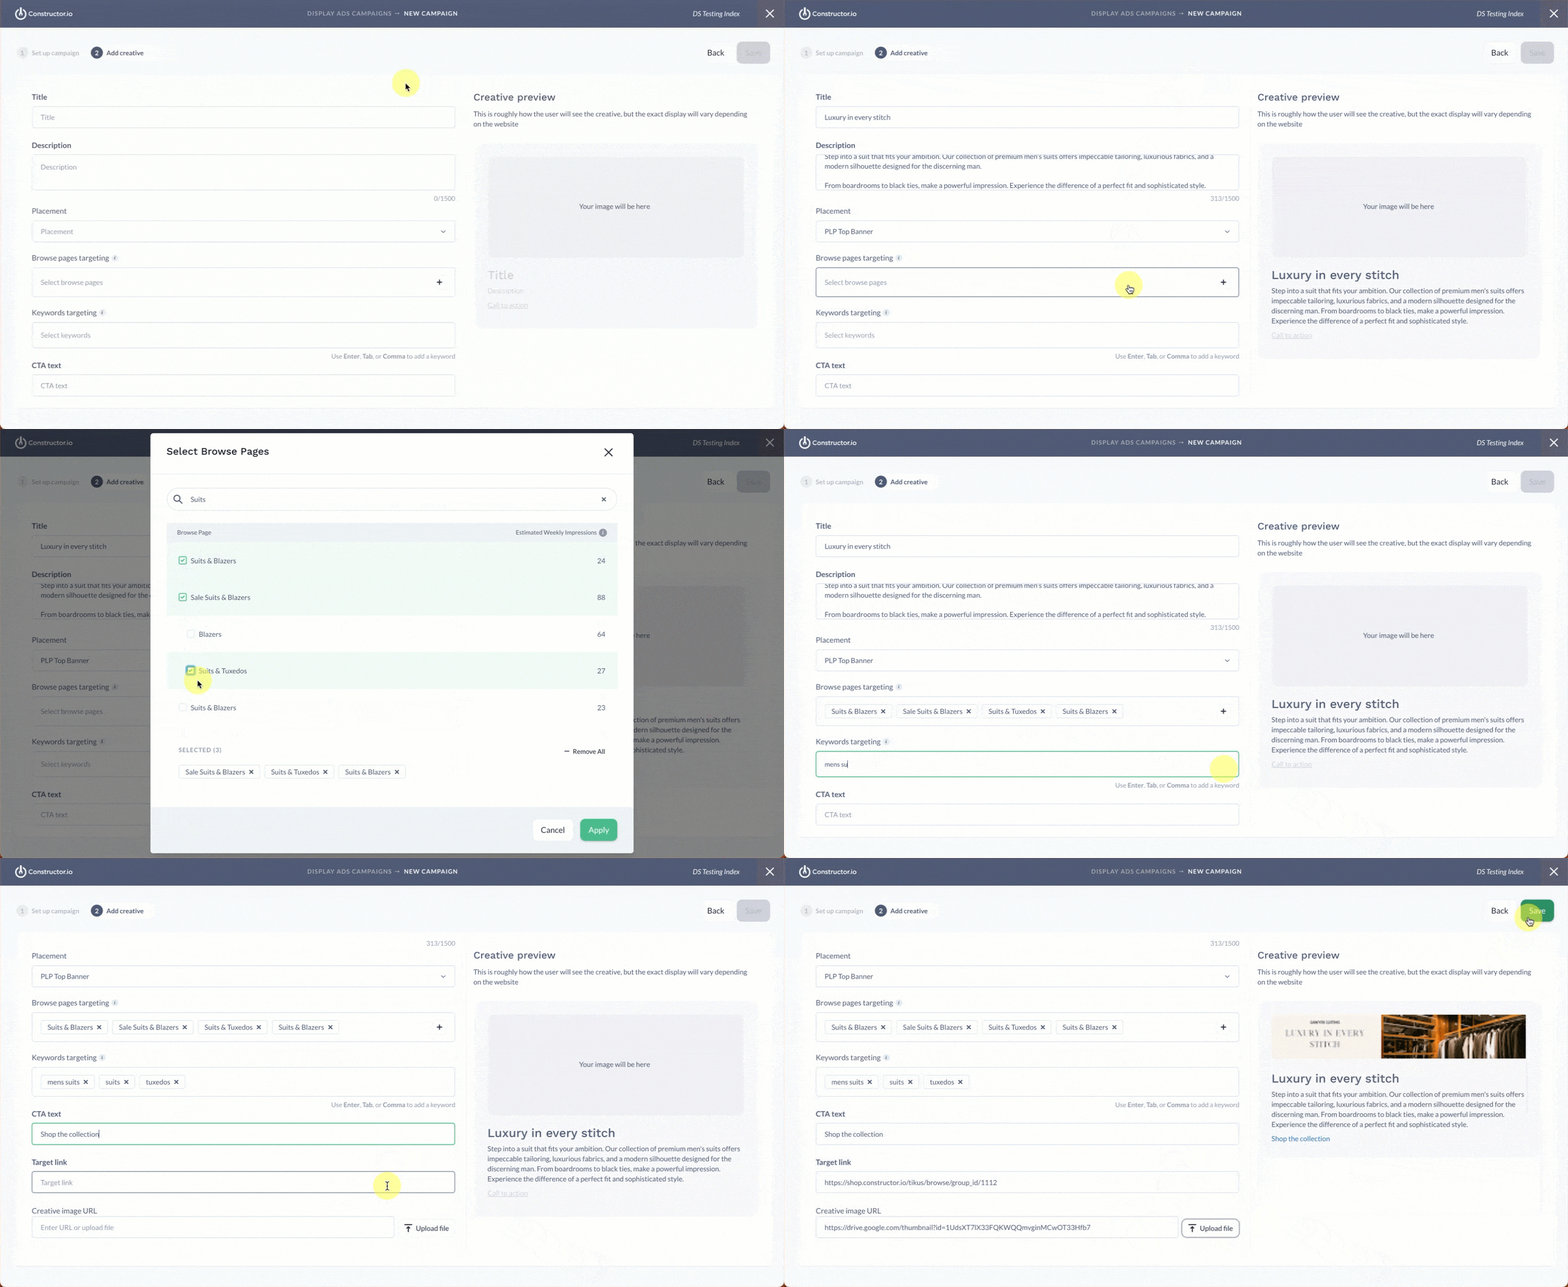
- Enter the campaign Title in the corresponding field. This is a required field.
- Enter a Description in the field provided.
- Choose the desired ad Placement from the drop-down.
- You can create a placement in Retail Media settings. Learn more here.
Select target pages
- Select the Browse pages targeting field to launch a pop-up listing of available categories.
- Select the checkbox to the left of the page name for each page you wish to target.
- Once you have chosen all the target pages, select Apply in the bottom-right corner of the pop-up.
- Enter the search queries you wish to target in the Keywords targeting field. Use your
EnterorTabkey to add a keyword, or separate each by a comma.
Add campaign creative assets
- Enter CTA text in the field provided.
- Enter or paste the CTA URL in the field provided.
- This is the destination where the user is taken when they select the ad. It can be a specific collection, category or facet page, a specific item detail page (PDP), or a simple content page on the site.
- Paste the URL for the ad image in the Creative Image URL field. Alternatively, you can select Upload to the right of the field to upload an image from your device.
- If pasting a URL, ensure the image is not hosted behind a password.
- Select Save in the top-right corner of the page.
Updated 2 months ago