Generate and manage API tokens
⚠️ Only users with permission to Generate API tokens can generate an API token. Learn more here.
API tokens act as passwords that allow applications to access several of Constructor’s authenticated endpoints.
A Constructor API token has three elements: an index + a scope (an endpoint requiring authentication) + an operation (read, write, or read & write). For example, a token can grant access to the Production US index where it has write access to the facet scope (facet(w)).
Do note that a single token can provide access to multiple index + scope + operation scenarios. Meaning, a token could provide read and write access to the catalog upload endpoint in the Production US index and provide write access to the catalog upload endpoint in the Production CA index. This is something you and your team can configure using the steps outlined in this article.
What should my company know about generating API tokens?
Below are some best practices that you and your team can follow for creating and managing Constructor API tokens. These practices will help your team avoid mix-ups with tokens and mitigate risk should a token be compromised.
- Create a token for a specific integration. For example, a token used to allow a specific system to integrate with Constructor.
- Only grant access for what is absolutely necessary. Tokens should only allow the level of access required to perform a specific task. For example, a token used exclusively for catalog uploads in
Productionindex for a specific country. - Consider creating tokens for separate indexes. Using different tokens for development, testing, and production indexes can help your team avoid mix-ups.
- Set expiration dates. Tokens should automatically expire after a set period. For example, 30 days or 90 days.
- Regenerate tokens regularly. Replace old tokens with new ones on a schedule to reduce risk. You can easily do this by regenerating a token.
- Quickly generate a new API token if one has been lost or compromised. Regenerate any compromised tokens. This will replace the existing token with a new one while keeping all assigned indexes, scopes, and permissions.
- Review regularly. Periodically review which tokens exist and delete any that are no longer needed.
Looking to grant access and permissions for specific users?Constructor allows you to create user roles and assign index and feature access, as well as view and edit permissions. Learn more here.
Why is proper API token creation and management important?
API tokens are essential for authentication and security because they verify who is making a request and control what actions that request can perform. By customizing an API token’s access and permissions, a company can limit its capabilities to exactly what is necessary. For example, granting read-only access for data retrieval or write access for updates.
This ability to customize access and permissions protects sensitive data, reduces risk if a token is compromised, and helps maintain clear accountability.
A note on legacy API tokens
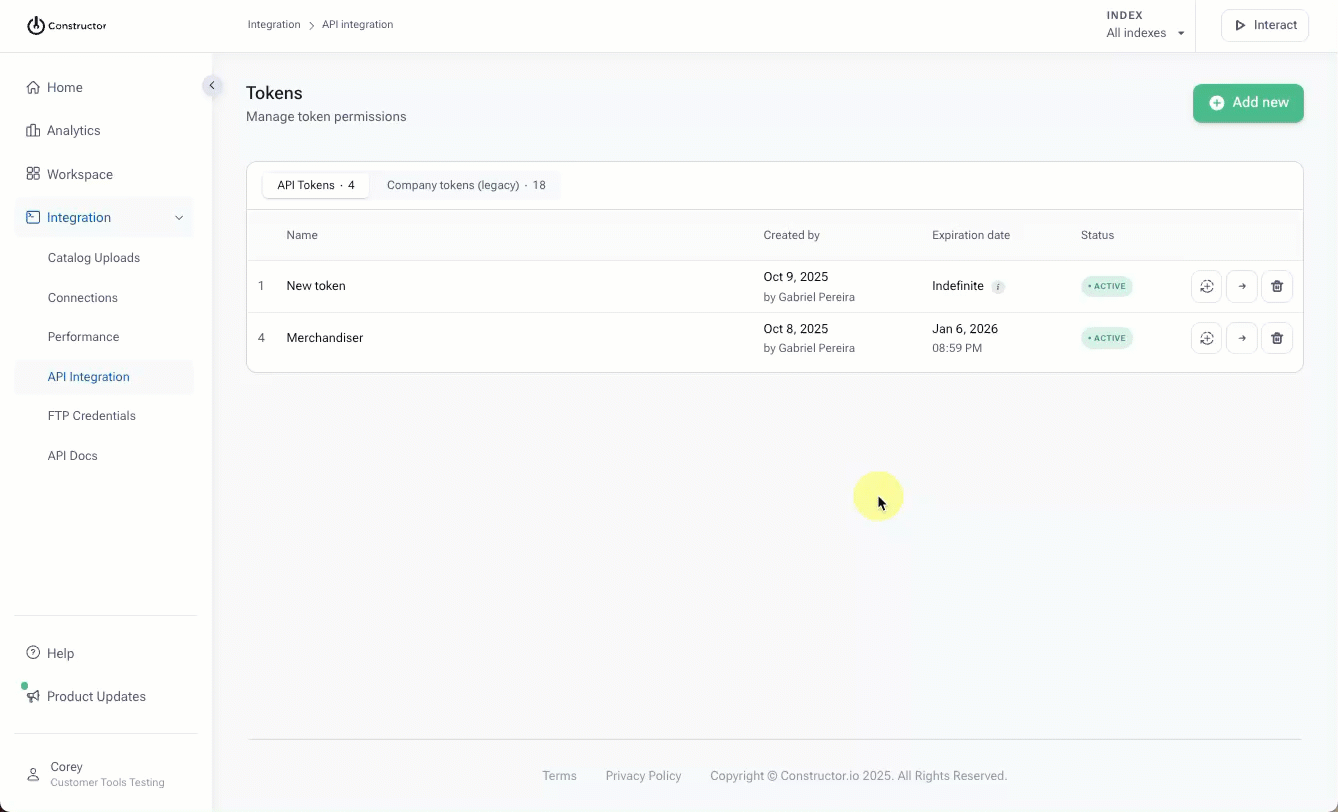
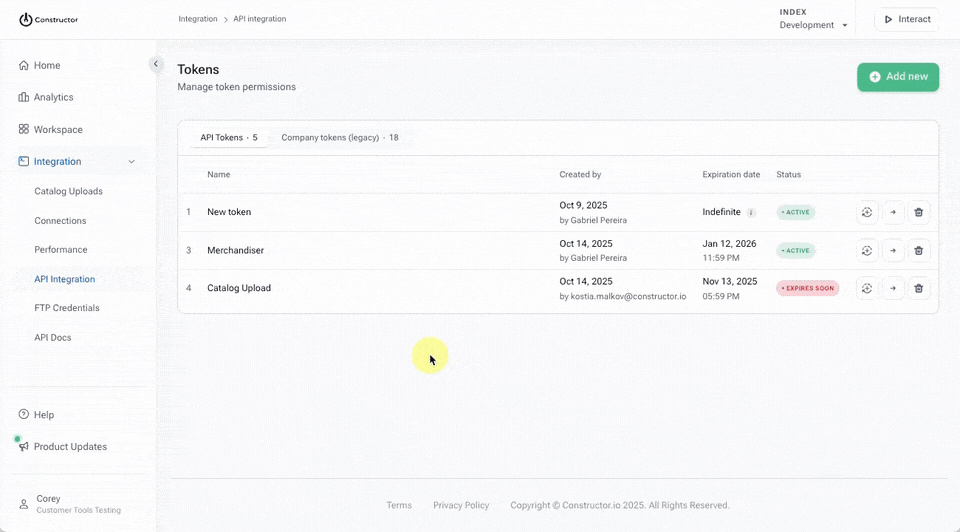
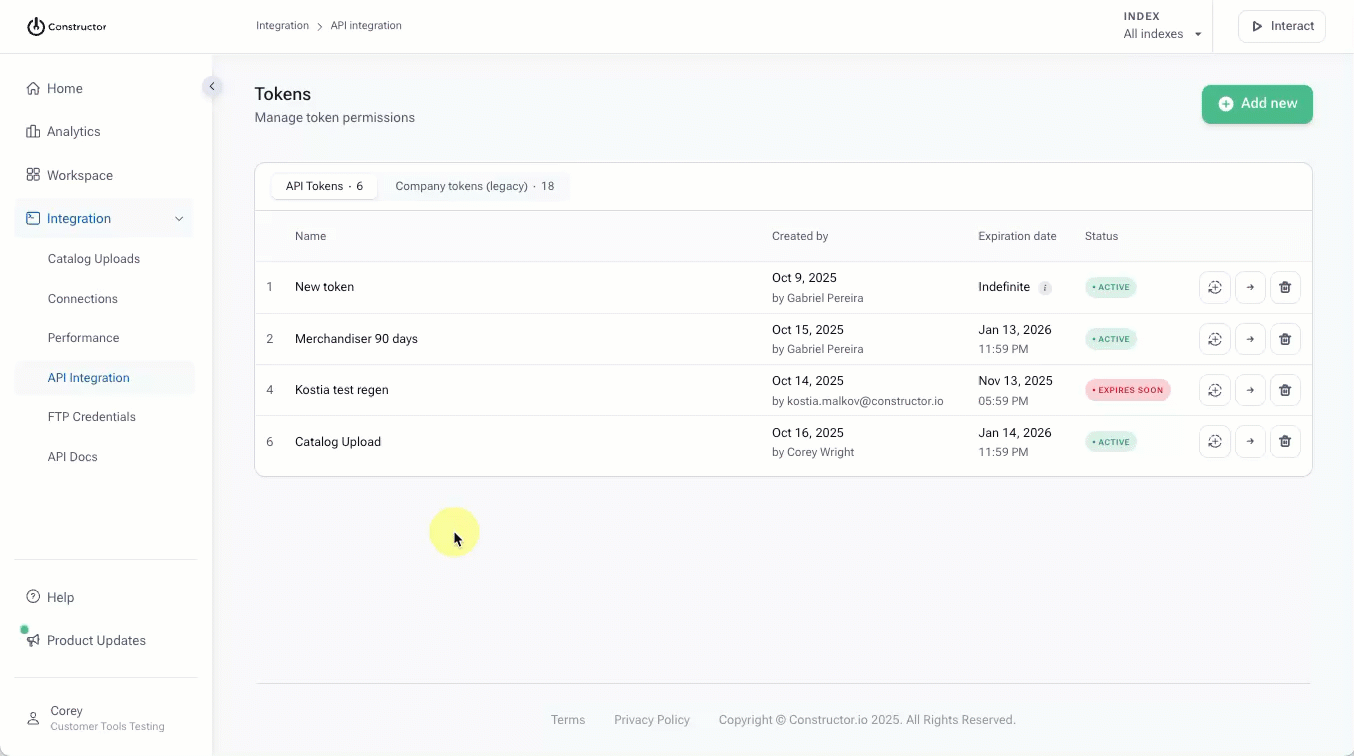
The API Tokens listing displays two categories of tokens: API Tokens and Legacy tokens.
API Tokens are tokens you generate following the steps outlined in this article. These tokens can be configured with specific index and scope access, and operations (e.g., read, write, or read and write).
Legacy Tokens are tokens that were generated prior to this dashboard functionality. These tokens have access to all indexes and scopes, and have read and write permissions for those spaces. These tokens still work and do not expire. You can choose to keep legacy tokens or delete them. Any newly created tokens will be listed under API Tokens, as users can no longer create legacy tokens.
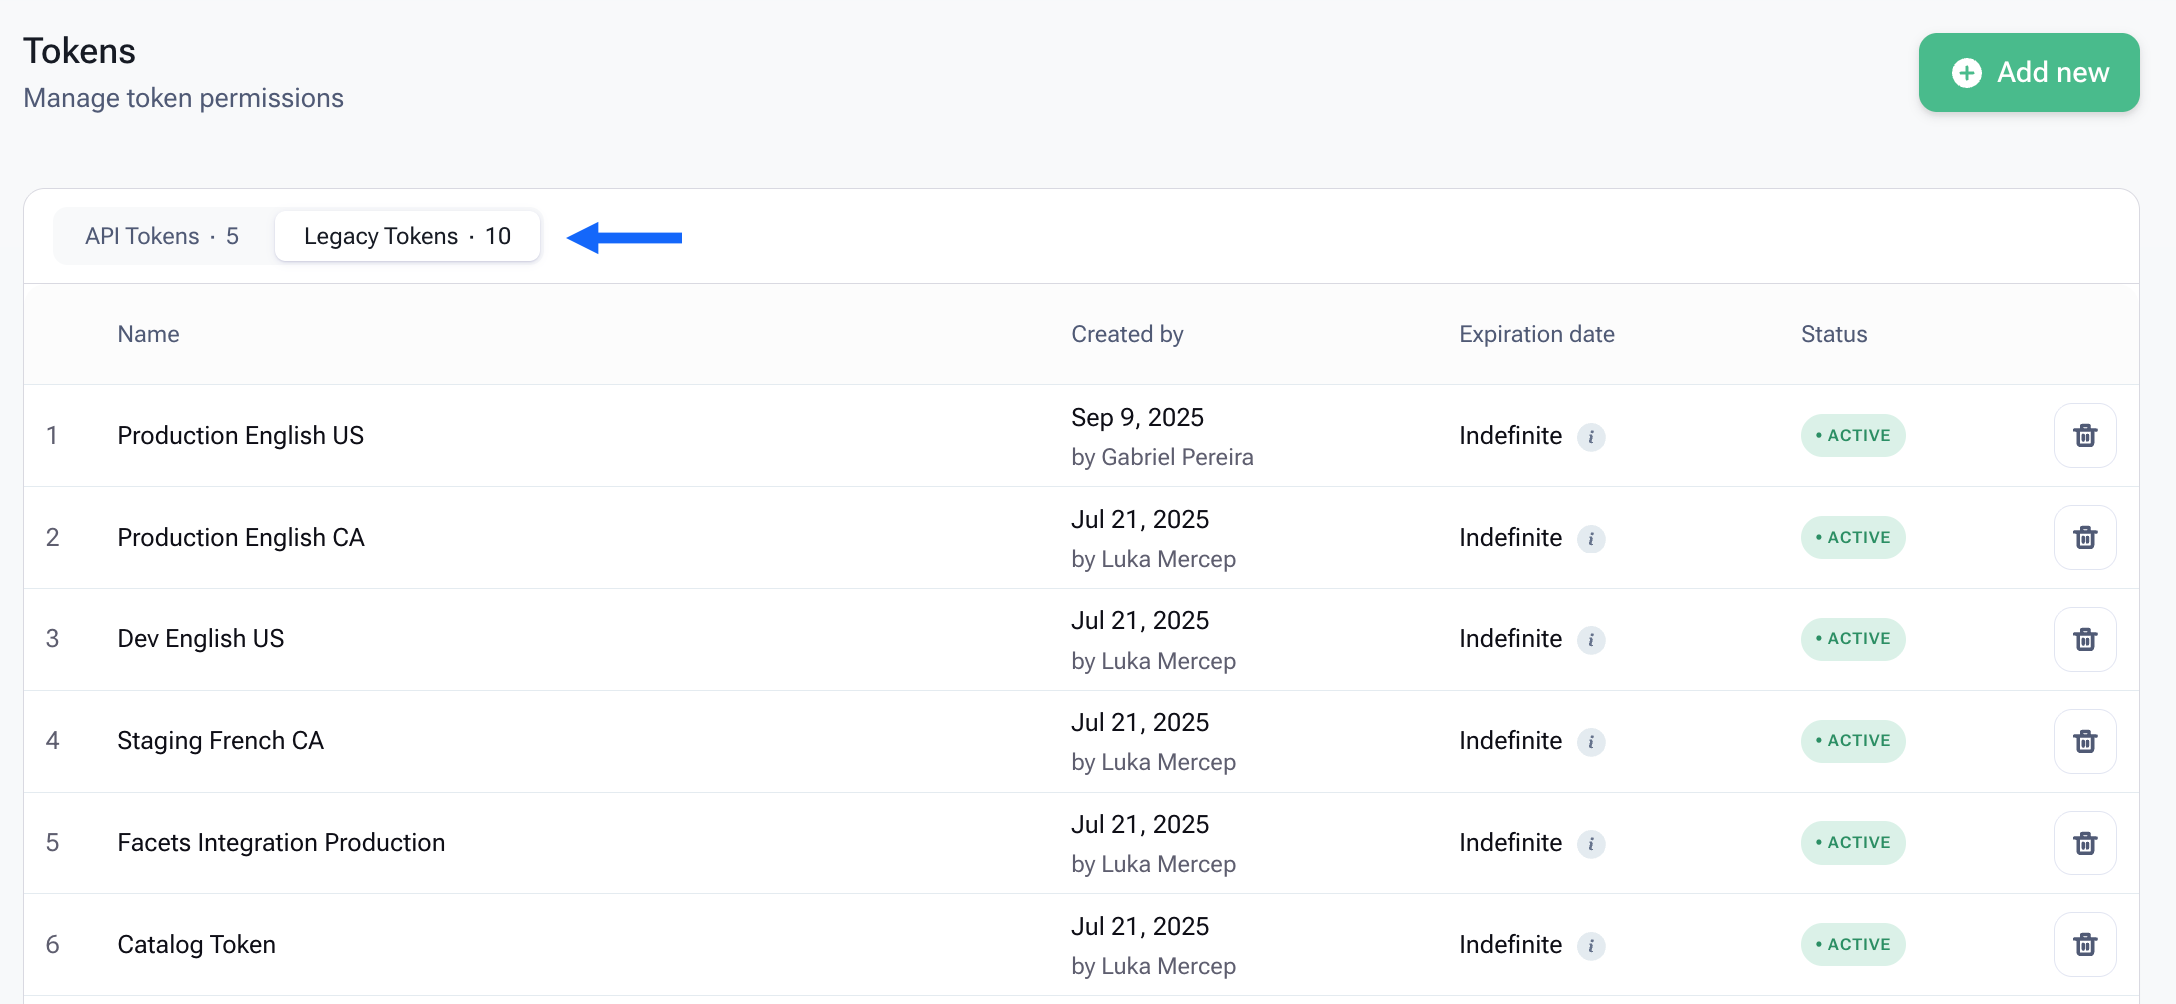
A list of legacy tokens in the Constructor dashboard.
Generate a new API token
You can generate and manage API tokens within the Constructor dashboard.
Step 1: Enter token details
- Select Integration in the side menu of the Constructor dashboard, then select API Integration.
- Select + Add new in the top-right corner of the page.
- Enter a Token name in the corresponding field on the left side of the page.
- Use the Expiration date (optional) drop-down to select an expiration date for the token.
- If selecting Custom, use the calendar date picker to select a specific expiration date, then select Apply.
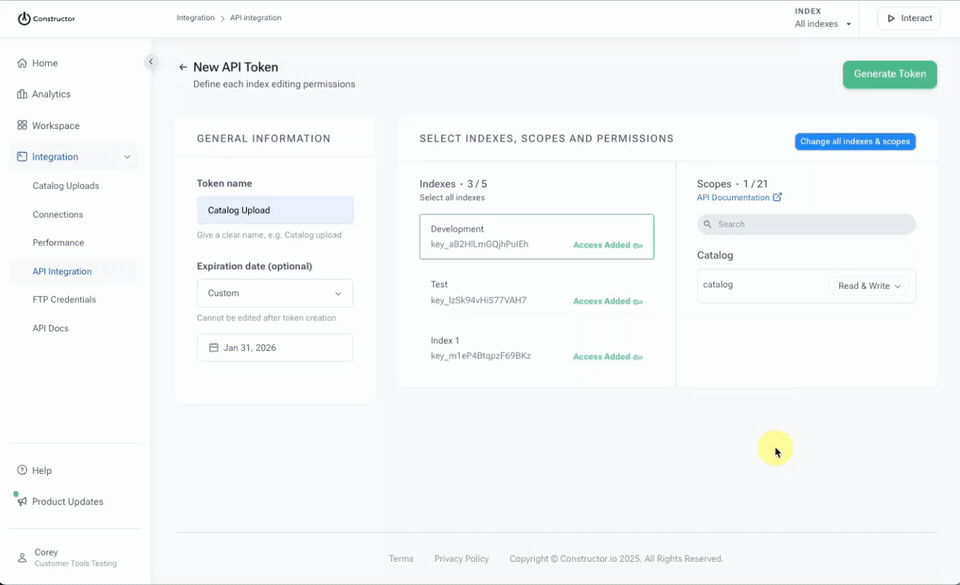
Step 2: Assign index(es) access
Next, you will choose the index(es) for which a token will provide access.
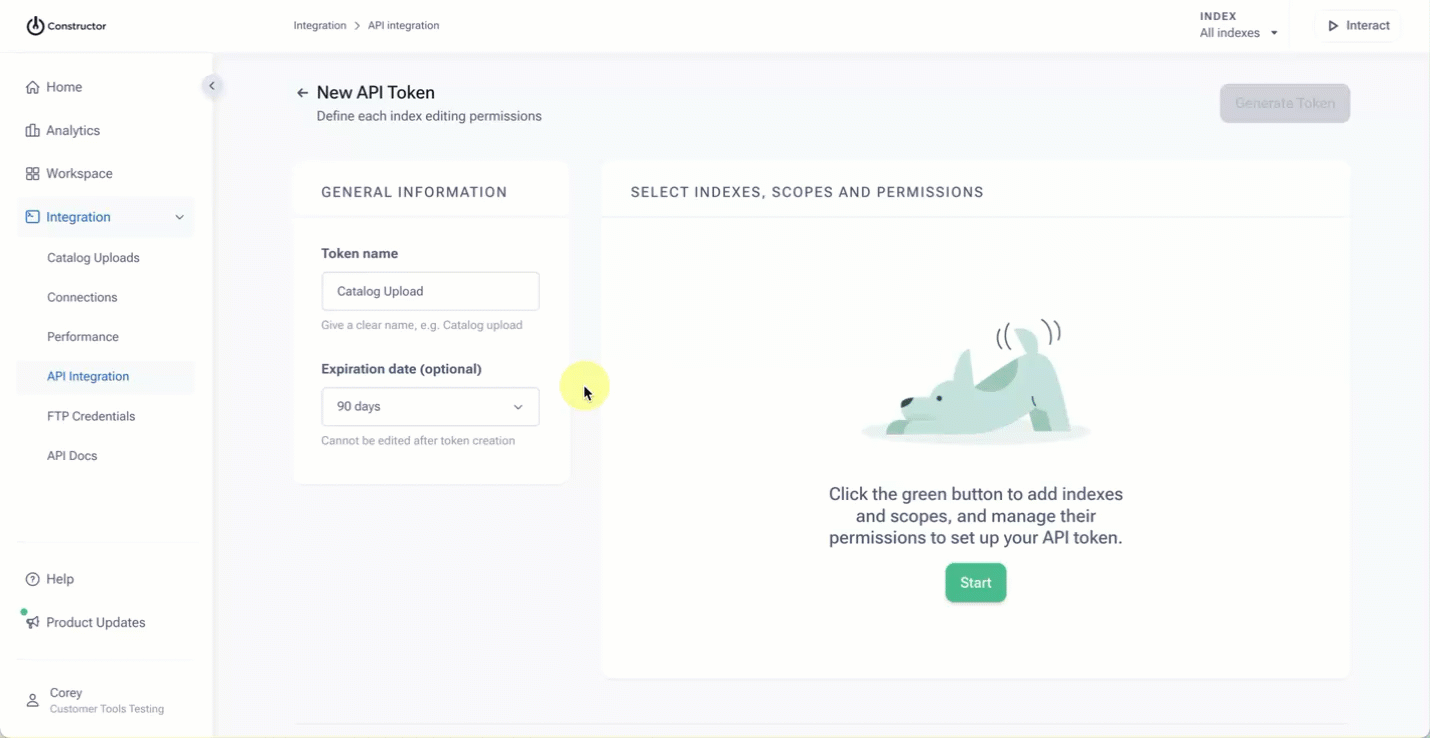
- Select Start on the right side of the page.
- On the pop-up, select the checkbox to the left of the index for which the token will provide access.
- You can use the search field to locate an index, or scroll to locate the desired index.
- You can remove an index by deselecting the checkbox beside the index name, or selecting X to the right of the index name at the bottom of the pop-up.
- Select Next in the bottom-right corner of the pop-up.
Step 3: Choose scope(s) and configure permission
Scopes grant access to specific endpoints that require authentication. When you select one or more scopes, you are allowing the token to access those endpoints. Keep in mind that these scopes will be specific to the index(es) you selected in the previous step.
In addition to selecting scopes, you will also need to configure the scope operation or permissions. Options include read and write, read, and write. By default, the selected scopes will have read and write permissions selected. You can change this by following the steps below.
Learn more about available scopes here.
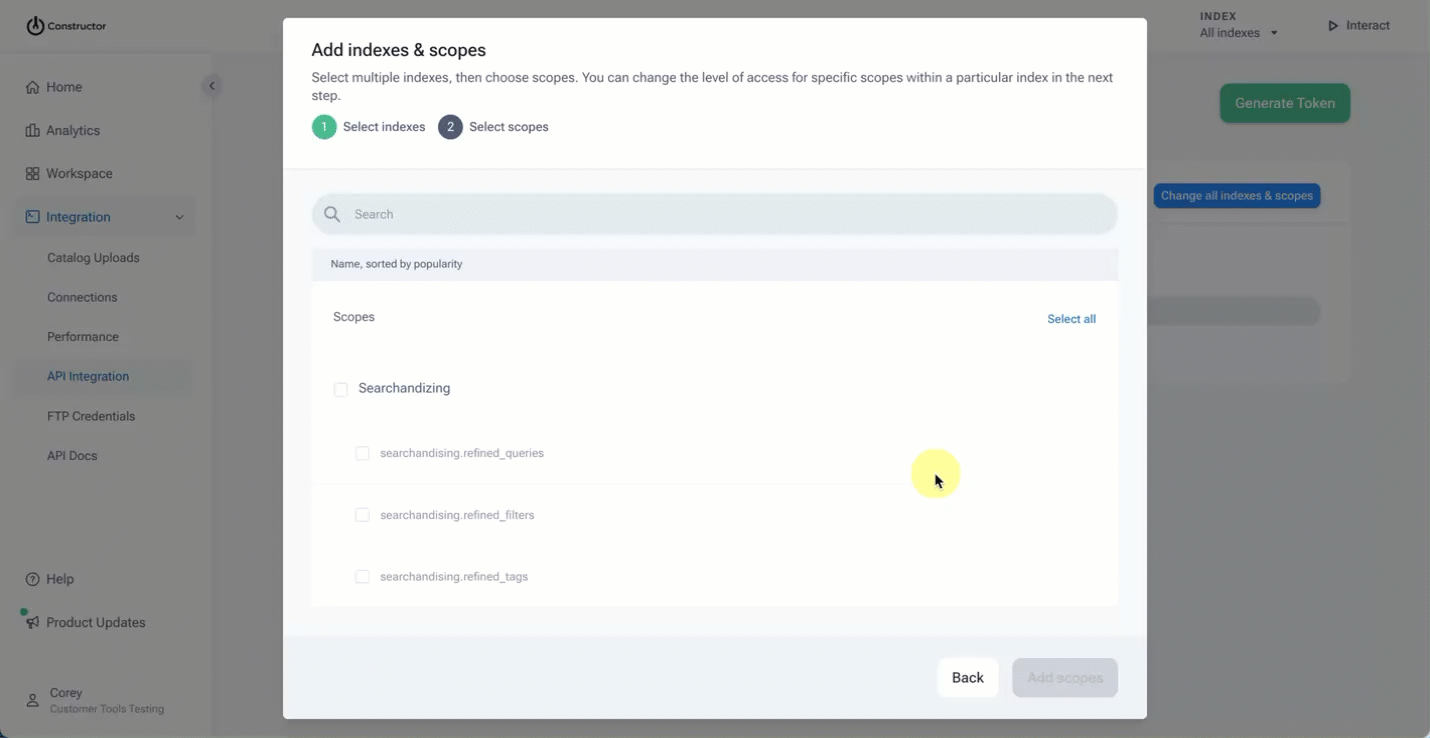
- Select the checkbox to the left of a scope name.
- You can use the search field to locate a scope, or scroll to locate the desired scope.
- Note: Selecting a scope category name will automatically select all scopes in that group. For example, selecting
Searchandizingwill select all scopes within that group (e.g.,searchandising.refined_queries,searchandising.refined_filters, etc.).
- You can remove a scope by deselecting the checkbox beside the scope name, or selecting X to the right of the scope name at the bottom of the pop-up.
- Select Add scopes in the bottom-right corner of the pop-up.
- To configure permissions, locate a scope in the far right column.
- Using the drop-down to the right of the scope name, select the desired operation from the options listed.
- Read & Write: The token can both view information and make changes. For example, it can look up facets and update facet configurations.
- Read: The token can only view information. It cannot create, change, or delete information. For example, it can fetch or display information.
- Write: The token can create or change information, but not necessarily view existing data. For example, it can send or update synonyms without needing to see all the information there.
Need to make changes to indexes and scopes?Select Change all indexes & scopes in the top-right corner of the page.
Step 3: Generate and copy API token
ImportantFor security reasons, you will only see the API token once. Please ensure that you copy it. After you exit this flow, you will not be able to view the API token again. If you did not copy the token, or if you lose the information, you will need to regenerate the token. Learn more here.
- Select Generate token in the top-right corner of the page.
- Review and agree to the disclaimer on the pop-up. This disclaimer informs you that the API token will only be displayed once for security reasons. Select I read the disclaimer to continue.
- If you haven’t confirmed your account in the last hour, then you’ll be prompted to provide a confirmation code:
- Select Get a confirmation code via email to send yourself a code. The code will be sent to the email address displayed in the bottom-left corner of the pop-up.
- Copy the confirmation code from your email and paste it into the field provided
- Did not receive a code? Check your spam folder. You can resend the code to your email by selecting Resend confirmation code to my email once the countdown ends.
- Select Next.
- The API token will display on the following screen. You can select the copy icon to the right of the token to copy it to your device.
- Please note: The API token in the visual above is obfuscated for security reasons. Your API token will display as an alphanumeric code.
- Select I copied the token.
- On the last screen, confirm that you have copied the token by selecting Yes.
View settings for existing API token
You can view index, scope, and permissions settings for existing API tokens from the API tokens listing. This can help keep track of existing, active tokens and what permissions those tokens have.
Please note that you cannot modify these settings or view the API token directly. If you discover a permission is missing from a token, you will need to create a new token, replace it where used, then delete the existing token.
- Locate the API token for which you wish to view access and permissions settings.
- Select the arrow icon on the far right of the token row.
- View the current settings.
- Navigate back to the API token listing by selecting the arrow to the left of the token name in the top-left corner of the page.
Regenerate an API token
Regenerating an API token allows you to generate a new API token for an existing set of access and permissions. This will replace the existing API token.
ImportantOnce you have regenerated a token, then the scripts or integrations that were using the old token will stop working. You will want to update those connections as soon as possible.
- Locate the API token you wish to regenerate
- Select the plus/regenerate icon on the far right of the token row.
- If you haven’t confirmed your account in the last hour, then you’ll be prompted to provide a confirmation code:
- Select Get a confirmation code via email to send yourself a code. The code will be sent to the email address displayed in the bottom-left corner of the pop-up.
- Copy the confirmation code from your email and paste it into the field provided
- Did not receive a code? Check your spam folder. You can resend the code to your email by selecting Resend confirmation code to my email once the countdown ends.
- Select Next.
- On the next screen, change a Token name, if desired. You can keep the original name.
- If applying an expiration date, use the Expiration date (optional) drop-down to choose the date.
- If selecting Custom, use the calendar date picker to select a specific expiration date, then select Apply.
- Select Regenerate in the bottom-right corner of the pop-up.
- The API token will display on the following screen. You can select the copy icon to the right of the token to copy it to your device.
- Please note: The API token in the visual above is obfuscated for security reasons. Your API token will display as an alphanumeric code.
- Select I copied the token.
- On the last screen, confirm that you have copied the token by selecting Yes.
Delete an API token
You can delete an API token if it is no longer needed or if it has been compromised. You cannot undo this action.
- Locate the API token you wish to delete.
- Select the trashcan icon on the far right of the token row.
- If you haven’t confirmed your account in the last hour, then you’ll be prompted to provide a confirmation code:
- Select Get a confirmation code via email to send yourself a code. The code will be sent to the email address displayed in the bottom-left corner of the pop-up.
- Copy the confirmation code from your email and paste it into the field provided
- Did not receive a code? Check your spam folder. You can resend the code to your email by selecting Resend confirmation code to my email once the countdown ends.
- Select Next.
- On the pop-up, confirm your action by selecting Delete.
Updated 3 months ago