Create a content rule
Available for Search, Browse, Campaigns, Collections, and Facet pages.
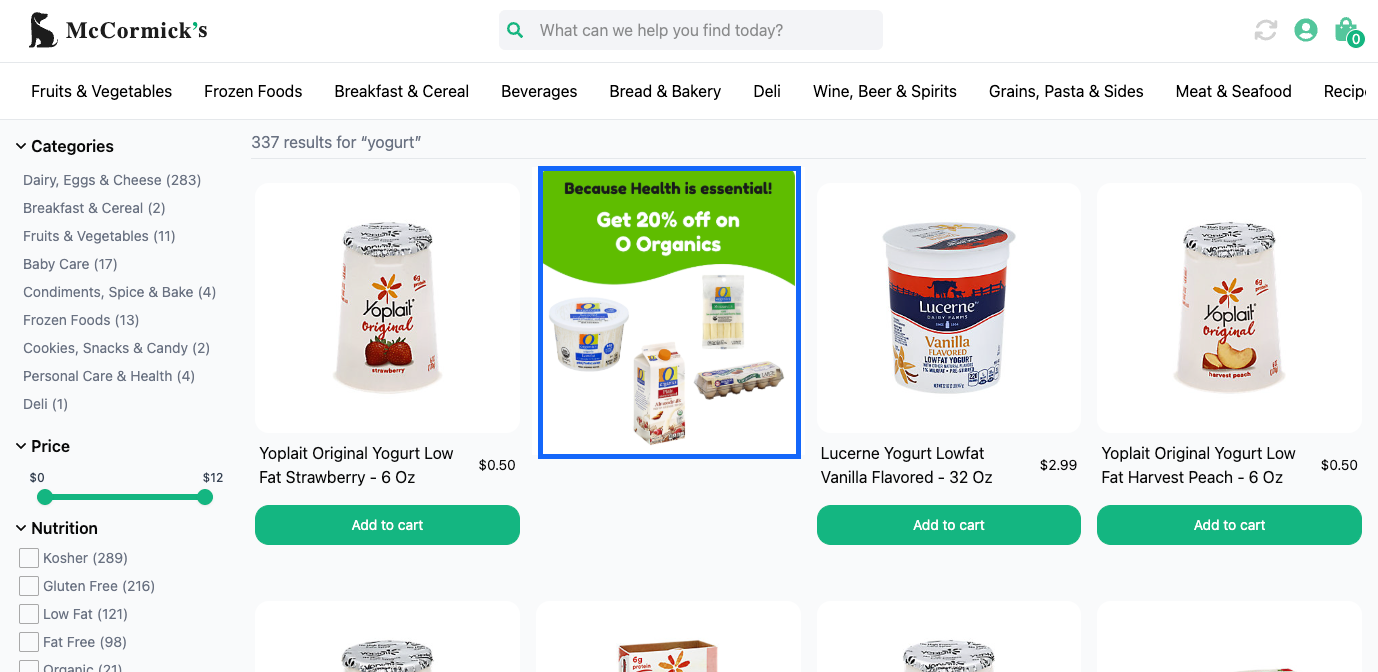
With content rules, companies can elevate shoppers’ search and browse experiences by adding additional content for a new product launch or promotion, or a relevant resource to a results page.
How it works
Merchandisers can create content rules for specific search and browse contexts, choosing whether to apply the rules to a specific user segment and/or for a specific time frame. Companies can also configure these rules using our API.
Content is returned in the refined_content section of the API response, allowing companies to render it on their website and/or mobile apps. Companies retain complete control over the styling of the content.
How can I use a content rule?
Content rules allow companies to be creative with the content they display on results pages. Below are examples of how companies might use content rules:
- Display promotional banners for limited-time offers or seasonal sales (e.g., show a “Summer Sale” banner on results pages for the queries
swimsuitsandswim trunks). - Show brand-specific content on a brand’s category page or relevant searches (e.g., show a Nike banner in a search for
men’s sneakers). - Promote dynamic offers tailored for specific segments based on user behavior (e.g., show a “Free Shipping” banner for users who have previously purchased from a specific category).
- Display a custom CTA that directs users to a specific page on your website (e.g., show a “Shop Now” banner that links to a new product launch or collection page).
- Advertise in-cart discounts for specific products or brands on a category page (e.g., show a banner offering further discounts on Samsung products to entice users shopping for washers to cart a Samsung washer).
- Promote content and guides relevant to the search results page or category (e.g., show a banner that links to a guide on picking the best hiking backpack on the
backpackscategory page).
Create a content rule
Step 1: Choose a context
Context refers to the results page for which you are creating the rule. For example, a search query, browse category, facet, or collection.
Want to apply the rule across multiple contexts?You’ll need to create a campaign. Follow steps 1-3 in our campaign article, then jump back here for steps 2-4.
- Select Workspace in the side menu of your Constructor dashboard, then select Searchandising.
- Select + Add New Rule in the top-right corner of the page.
- On the pop-up, choose the context for which you wish to create the rule:
- If you select Search, then choose the desired search query from the list provided. Select Continue to proceed.
- If you select Browse, choose Category, Facet, or Collection. Select the desired option from the list provided. Please only select one category/facet/collection. Select Continue to proceed.
- If you select Campaign, choose the various queries and browse experiences to include in the campaign. Learn more here.
Step 2: Configure rule
Use the options available in the side menu to configure the content rule.
Add asset
- Select + Add Rules & Content on the left side of the page.
- In the Content section, select Add Content.
- Enter or paste the URL for the visual content asset in the Asset URL field.
- ⚠️ Please note: A preview of the asset will appear on the right side of the page. This is not intended to represent how the asset will appear on your website, as your company will design its appearance. Learn more here.
- Enter a description of the visual asset in the ALT text field. This description will appear for those users using a screen reader.
Using a different asset for mobile devices?Select + Use a different asset for mobile. This will display additional URL and ALT text fields where you can enter the relevant information.
Define content properties
Content properties are optional and are rendered according to a website’s styles implementation. You can locate these options by expanding the Content Properties drop-down.
- Header: Enter a content heading that can be rendered within the results page.
- Body: Enter content body copy that can be rendered within the results page.
- CTA text: Enter text that will render for the CTA URL.
- CTA URL: Enter or paste the CTA URL. This is the destination where the CTA will take a user. If no CTA text is provided, then the entire asset (e.g., the banner or visual) will act at the URL trigger.
Use tags
Tags are a key-value pair that a company can use for additional flexibility or logic when rendering. Identifiers and their corresponding values can be entered in the Tag name and Value fields, respectively.

For example, a company uses one index to power websites for multiple countries. Due to information differing between countries, they need one piece of content to show on the US website and another piece of content to show on the UK website. Using tags, they can add the key-value pairs location:US and location:UK, then use logic in the rendering to determine which content shows based on geographic region.
Companies can also use tags to achieve more advance styling. For example, if the company wishes for the content to appear within the results grid, then using the tag results_position:2 would allow the company to render that outcome. Or, say images within the content default to the top but a company wants alignment flexibility. Tags like image_position:left or image_position:right would allow them to render their desired result.
Much like the remainder of the rendering logic, tags and tag structure is completely up to a company to define.
Add a user segment
You can apply the rule to a specific subset of users by defining a user segment. Available segments include geo-based segments, segments provided using the us parameter, and AI-generated segments (e.g., RFM, Affinity, etc.).
- Select the user icon in the Set User Segment section of the side menu.
- On the pop-up, select your desired segment.
- Use the Search field to search for the segment by name.
- Select any of the segment categories (e.g., Affinity, RFM, Location, etc.) to view available segments.
- Note: Analytics for a segment reflect the behavior of the users included in the individual segment over the last 30 days.
- Select Continue in the bottom-right corner of the pop-up.
Add start/end dates
You can add a Start Date and End Date to the rule, which allows you to time box the rule's impact on returned results. Dates are not required. You can also define a start date without a set end date. Start date will always default to the current date.

- Select the calendar icon to launch a pop-up where you can define start and end dates and times.
- Dates: Select either Date field to launch a calendar picker, which allows you to choose a specific start and end date.
- Time: Once you define a date, a default start or end time will populate in drop-down fields to the right of the date fields. Use these drop-downs to edit the start and end times (hour, minute, AM/PM). Times are displayed in the time zone shown below the fields.
- Once done, select Apply in the bottom-right corner of the pop-up.
Step 3: Preview rule
Once you have added a content asset, the Searchandising (and, if saved, Interact) page will show a preview. This preview updates in real-time as you make adjustments.
Please note that these previews are generic as Constructor does not match your website styling logic. Previews are meant to validate the data within the content rule rather than reflect the total look and feel of the experience on your website.
Step 4: Save the rule
- To save the rule, select Add in the bottom-left corner of the page. This will take you back to the list of all rules and content for the context.
- Select Save Rules in the top-right corner of the page to save the rule.
- Your changes will be live shortly. If you applied a user segment, you can preview that experience by impersonating the segment.
Updated 4 months ago